Each page of your website must have its own unique name and web address.
These two items help your visitors get to the page either by clicking a labeled
button (Button Name) or by directly accessing the page via a link (Web Address).
For best results, keep both the Button Name and Web Address short, simple, and
as similar as possible. Remember, though, that web addresses cannot contain
punctuation or spaces. To name (or rename) a page of your site:
- Open the page you wish to edit in the page editor.
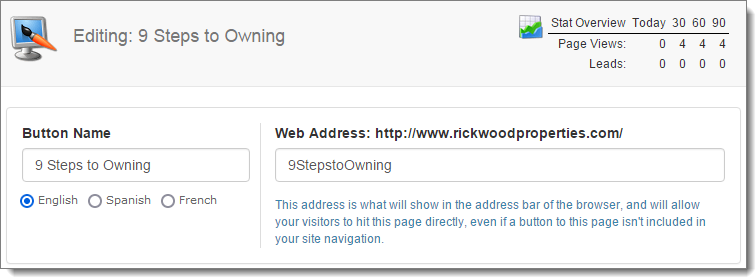
- In the top section, type a Button Name and Web
Address into the provided fields.
- Button Name — Enter the text as you'd like it to
appear on the button in your site's navigation menus.
- Web Address — Type the rest of the web address
that you want to use for the page as you'd like it to appear in the address
bar. The link you create can be used to directly access this page on your
site in case you'd like to use the link in your other marketing efforts. For
example, in the image below we've entered "9StepstoOwning" for our web
address. So, we can send a client directly to that page by having them go to
www.RickWoodProperties.com/9StepstoOwning
- Next, add any custom
content you want in your page.
- Then, add any dynamic content tools or contact forms to your
page.
- Tweak your search
engine settings for the page.
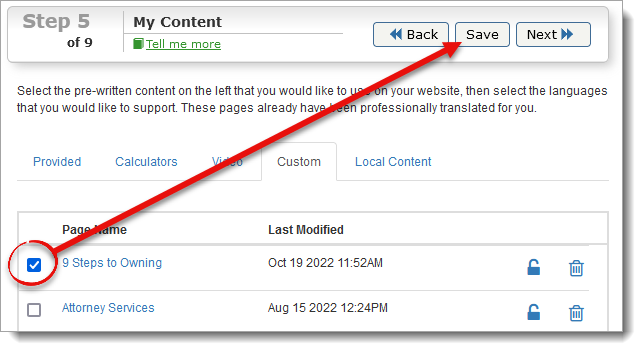
- When finished, click Save and Close to save the page and
return to the My Content section
of the XSites Wizard.
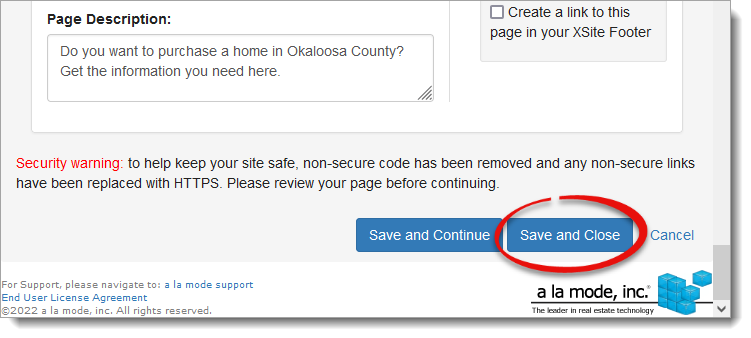
If you're making a lot of changes to a page, it's a good idea to scroll
to the bottom and click
Save and Continue periodically.
This saves your progress and keeps the
page editor window open so that you can
continue working.
Then, be sure to check the page and click Save in the My Content step to active the page on
your website.
Just as you can edit the content of each page in your site in any of the
languages your site supports, you can also define custom web addresses and
button names for your page in each of those languages. Once you've defined your
Button Name and Web Address in English (and saved the page), you can change
those items in other languages by editing the page, selecting the language you
wish to edit from the options below the Button Name field,
creating the Button Name and Web Address in
that language, and saving the page.