Delivering XML + PDF files via DataCourier
This document describes how to deliver MISMO XML reports to any client's email address, or get the XML file so you can upload it to your client's web portal.
Document 2012 | Last updated: 01/07/2022 MJY
Delivering to Mercury Network?
If you intend to deliver your report to a Mercury Network client, you should NOT use DataCourier to deliver the report via secure email. Instead, use the Mercury Network delivery plugin built into your software — you'll find instructions here.
Depending on the major form type in your appraisal, you might only see the option for "PDF via DataCourier" when delivering your report. To create both XML and PDF copies of your report, swap your form for an XML supported form. Click here for more information and a list of XML supported forms.
Click the panel below that corresponds to the type of delivery you're trying to accomplish.
Option 1: Send XML + PDF via Secure Email
Watch the video below to see how to do this in TOTAL.
Securely deliver XML and PDF files to any email address:
These instructions assume that if you've gotten to this point, you've completed and signed your appraisal report using the UAD version of the major form, or one of the supported non‑UAD major forms. Click here for a list of supported forms.
- With your report open, click Deliver to Client (
 ), hover over Deliver with TOTAL Connect, and select XML + PDF via DataCourier.
 - An E&O check is run, and if errors are found, you have a couple of options:
- Run E&O
- The E&O view shows details about the errors that were found — UAD and otherwise. Double‑click an error description to jump to the field in the form to correct it. The Details option shows a more narrative description of every error reported, and the Client Instructions option allows you to write notes (possibly describing why there may be errors) that are transmitted with the XML and are visible to the client.
- Deliver
- This means you're okay with any errors that were found and/or have explained why it was necessary to leave these errors in the file. If you're leaving any UAD errors, expect to explain your reasons to your client when they submit the report to UCDP, since they receive a report of any errors.
- When the print dialog appears, choose the forms you want in your PDF as you normally would and click OK. This PDF is embedded in your XML file.
- After printing, the DataCourier Send Securely plugin will appear.
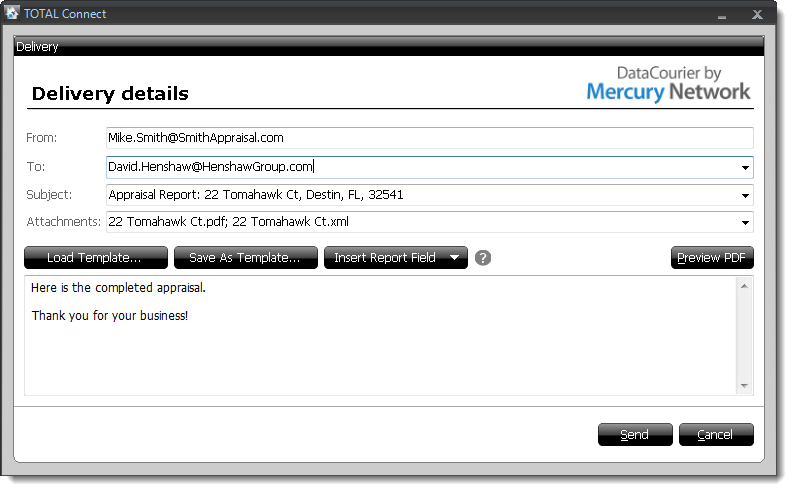
Now there are few things to do before delivery.
- Enter the email address from which you want to send the message in the From field. This field remembers the last email address you entered — leave this as it is, or adjust it as needed.
- Enter the recipient's address in the To field. Send to multiple recipients by separating each email address with a semicolon.
- Notice that the dropdown for the Subject field pulls information from your report. Select an option to use information from your report, or customize the subject line by manually entering the information you want to appear.
- Type any message you want to accompany your delivery in the field provided near the bottom of the window.
- Click the Preview PDF button to see the PDF you're about to send.
- Click Send, and that's all there is to it.
What your client sees
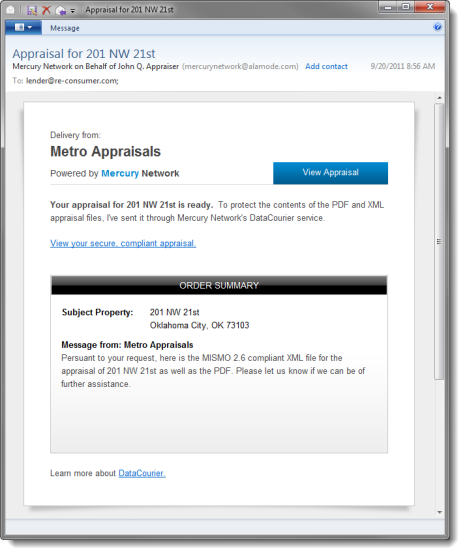
Your client receives a notification similar to the following in their Inbox. Note that the PDF and XML files are not attached. Instead, there is a link for retrieving them — which is much more secure, and less likely to be blocked by a spam filter.
If the recipient never gets the notification in their Inbox, be sure to have them check their SPAM folder.
After clicking the View Appraisal link, the client then sees a screen similar to the following. From here, they can download the MISMO 2.6 compliant XML file and/or the PDF. Even though the PDF information is embedded in the XML file, we provide a separate link to just the PDF because many lenders and AMCs don't have tools to extract and view the PDF from the XML file.
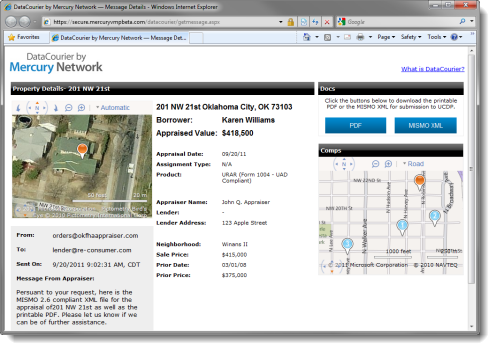
That's it. Your client has now securely downloaded the MISMO XML and/or PDF of the report.
What you see
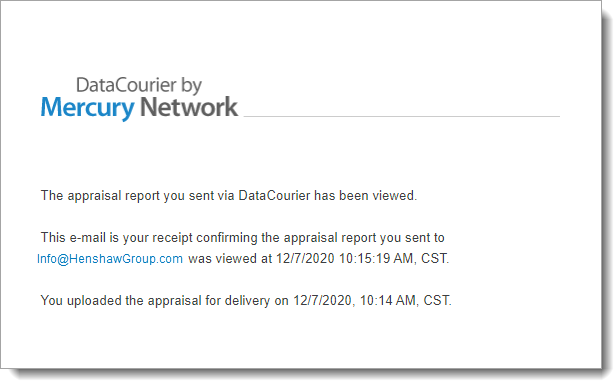
Once your client clicks the View Appraisal link in the email, a notification is sent to you to let you know that the client has viewed the report.
Option 2: Upload XML + PDF to a Client's Web Portal via SmartBrowser
Some clients request you upload your report MISMO XML file to their web portal. Often, this means you need to remember the URL for the site, your username, a password, and even more details in some cases. If you're working with more than just a couple of these portals, that's a lot of information to keep track of. DataCourier's SmartBrowser makes things considerably easier than just using your usual Internet browser. Here's how it works:
These instructions assume that if you've gotten to this point, you have completed and signed your appraisal report using the UAD version of the major form, or one of the supported non‑UAD major forms. Click here for a list of supported forms.
- With your report open, click Deliver to Client ( ), and select Upload to Client using SmartBrowser.
- An E&O check is run, and if errors are found, you have a couple of options:
- Run E&O
- The E&O view shows details about the errors that were found — UAD and otherwise. Double‑click an error description to jump to the field in the form to correct it. The Details option shows a more narrative description of every error reported, and the Client Instructions option allows you to write notes (possibly describing why there may be errors) that are transmitted with the XML and are visible to the client.
- Deliver
- This means you're okay with any errors that were found and/or have explained why it was necessary to leave these errors in the file. If you're leaving any UAD errors, expect to explain your reasons to your client when they submit the report to UCDP, since they receive a report of any errors.
- When the print dialog appears, choose the forms you want in your PDF as you normally would and click OK. This PDF is embedded in your XML file.
- Now, the SmartBrowser opens, and there are a few components to note:
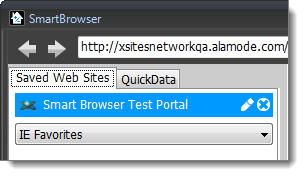
- The address bar at the top is where you enter the web address of your client's portal. Enter the address and press Enter to view the site in the area on the right of SmartBrowser. When you do, that address is added to the Saved Web Sites tab on the left so you can easily return without typing the address again.
- The Saved Web Sites tab is where you find quick links to those sites you've previously visited using SmartBrowser. As you hover over each site in the list, an Edit icon (
 ) appears. Click it to enter a description, edit the URL, and save your Username and Password for the site so you don't have to re‑key it next time.
Right‑click any saved site to set it as SmartBrowser's "home" page that opens by default each time you launch SmartBrowser.
Your Internet Explorer Favorites are also available here. So, if the address to one of your client's portals is already in your Favorites, just select it from the list.
A "help panel" appears near the bottom left of SmartBrowser. If you'd rather not see the help panel or it's in your way, check the box next to Hide help panel near the bottom of the help panel.
- The QuickData tab gives you easy access to the report data so you can easily fill out any forms on your client's portal. The main goal of the QuickData tab is to keep you from having to re‑key data into your client's site. So, on the QuickData tab, much of the report's salient data is listed with a Copy Icon (
 ) next to it.
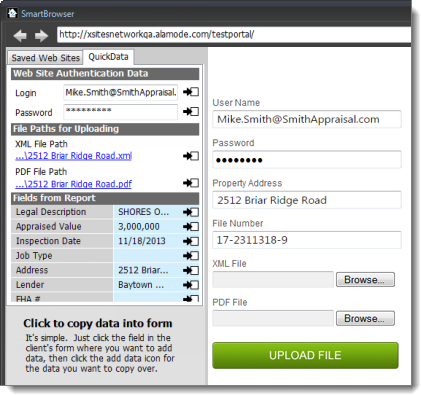
Here's what to do:
- Place your cursor in the field on your client's portal (on the right of SmartBrowser) where you intend to enter information — let's use Property Address for example.
- On the QuickData tab, click the Copy Icon ( ) in the Address field. The address information is populated in the field where you placed your cursor. Repeat this process for most any field you find on your client's portal (since they all require very similar information.)
Some fields on the portal require you to click Browse and select the location of the MISMO XML or the PDF. Instead, place your cursor in the field, and click the Copy Icon (
) next to the XML or PDF file path on the QuickData tab. SmartBrowser does the rest of the work, so you might see the portal's "Browse" dialog appear momentarily while the path is selected, but you don't need to do anything else.Also, when you click the Copy Icon (
) , the data in the field is copied to your computer's clipboard. So, if you need to use the data in a popup, you can just Paste the data into the field. - When all the information has been entered, use the button on the portal to Submit, Send, Upload — or whatever the site's equivalent button is — to upload the files and information to the client.
Since SmartBrowser doesn't actually "monitor" the upload process at this point, use the web portal's "progress bars" and/or "upload complete" notifications to confirm the file has uploaded — just as you would in any Internet browser.
- When the upload is complete, click the X in the upper‑right corner to close SmartBrowser. When you do, a prompt appears and asks if the upload was successful or not. Mark the correct option to store a record of this transmission and update the status of the file.
Option 3: Save XML + PDF to Your Computer
Watch the video below to see how to do this in TOTAL.
In some cases, you need to transmit your XML and PDF using a completely different method than a portal or via email, such as saving to a USB drive, or simply archiving for USPAP compliance. Either way, DataCourier lets you save your XML and PDF to a location on your local PC so you can deliver or store the files to suit your needs.
Please remember: attaching MISMO XML and PDF files to a standard email message is a potential violation of GLB privacy rules, and we definitely DO NOT recommend it.
These instructions assume that if you've gotten to this point, you have completed and signed your appraisal report using the UAD version of the major form, or one of the supported non‑UAD major forms. Click here for a list of supported forms.
To save your MISMO XML and PDF locally:
- With your report open, click Deliver to Client ( ), and select Save XML and PDF to your PC.
If the major form in your report is not the [UAD] version of the form, or one of the supported non‑UAD forms, only the option for "PDF via DataCourier." is displayed. Click here for a list of supported forms.
- An E&O check is run, and if errors are found, you have a couple of options:
- Run E&O
- The E&O view shows details about the errors that were found — UAD and otherwise. Double‑click an error description to jump to the field in the form to correct it. The Details option shows a more narrative description of every error reported, and the Client Instructions option allows you to write notes (possibly describing why there may be errors) that are transmitted with the XML and are visible to the client.
- Deliver
- This means you're okay with any errors that were found and/or have explained why it was necessary to leave these errors in the file. If you're leaving any UAD errors, expect to explain your reasons to your client when they submit the report to UCDP, since they receive a report of any errors.
- When the print dialog appears, choose the forms you want in your PDF as you normally would and click OK. This PDF is embedded in your XML file.
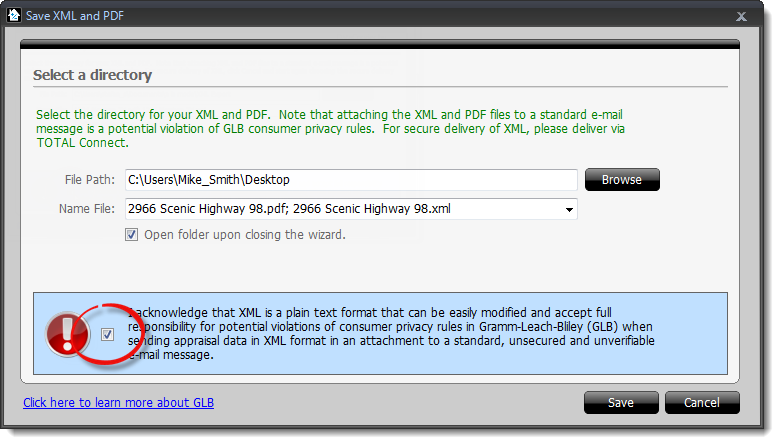
- When the Export XML and PDF dialog appears:
- A default File Path is entered for you automatically. Continue with the default path, or click Browse to choose a different location.
- The Name File field uses the main file number from you report by default. Continue with the main file number, or select a different field from your report using the drop‑down menu
- Check the box next to Open folder upon closing the wizard to open the folder where the files are saved when it's finished.
If your client requests a specific file name for the XML prior to delivery, make sure that this box is checked prior to saving the XML to your computer. When you save the XML and the folder you saved it in opens, right click the XML file and choose Rename. Then, just enter the requested file name and press Enter to save it.
- Before you click Save, you must check the box near the bottom of the window to acknowledge that you're aware of the risks of sending appraisal data in XML format using a standard, unsecured email message.
- Click Save to save the files to the selected location.
That's it — Now your XML and PDF files are available on your local PC.