Saving an .ENV (AI Ready) File.
This document explains how to save your appraisal in the .ENV file format. This is useful for uploading your appraisal to a portal that requires the .ENV format.
Document 2030 | Last updated: 10/14/19 MJY
Before you begin:
You must have an active TOTAL Connect Pro membership to create an .ENV file. To learn more about the differences between our free TOTAL Connect and paid TOTAL Connect Pro memberships, click here.
Watch the video below to see how to do this in TOTAL.
Choose the appropriate section below to get started.
TOTAL .ENV File Creation
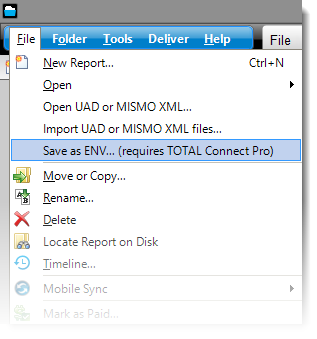
- With the report you want to convert signed and open in TOTAL, click File, then select Save as ENV… (Requires TOTAL Connect Pro).
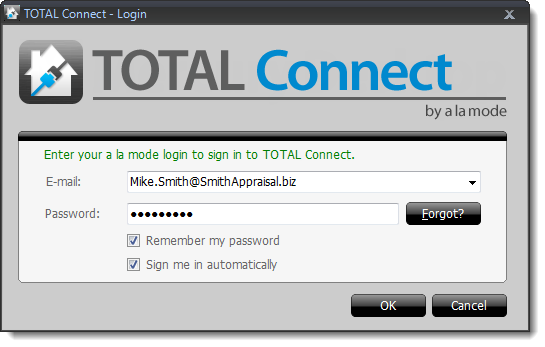
- If you're prompted, login to TOTAL Connect.
- Enter your Job Number and click Next.
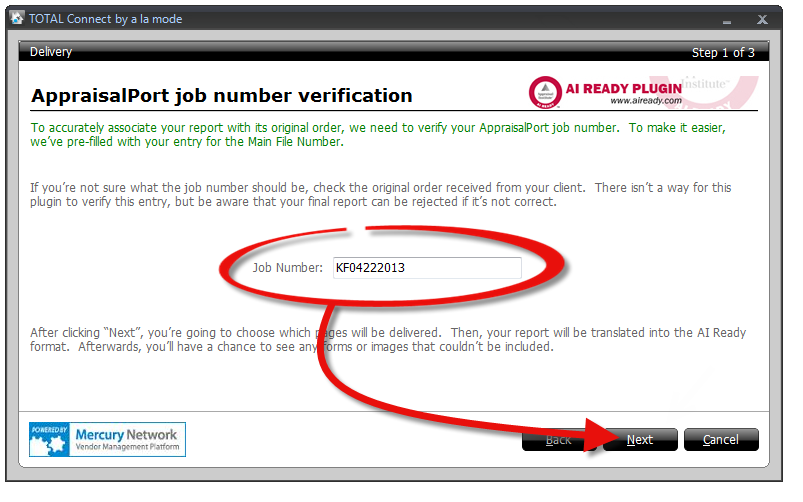
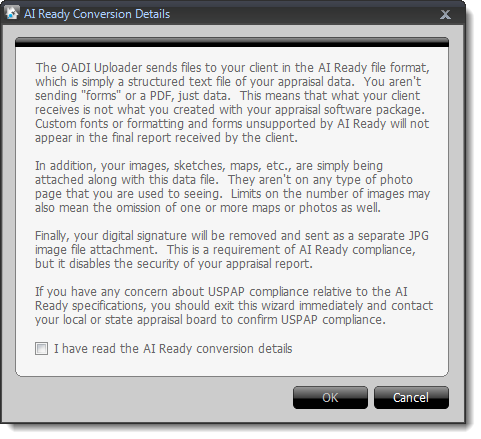
If this is your first time using the AppraisalPort plugin, you're prompted to confirm that you have read the AI Ready Conversion Details. Check the box on the lower left, and click OK to proceed.
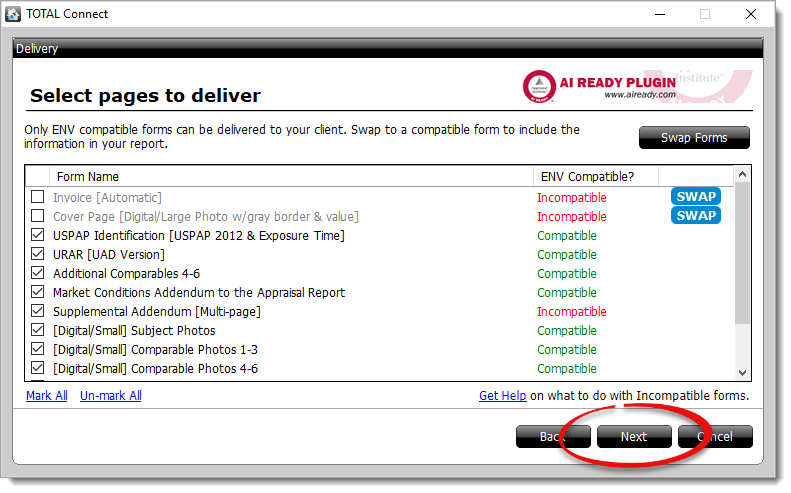
- Choose the pages you want to include in your report and click next. Any pages marked Incompatible are not included in the converted report. If a compatible form is found in TOTAL, this screen gives you the opportunity to swap the form by clicking SWAP Click here for a complete list of compatible forms.
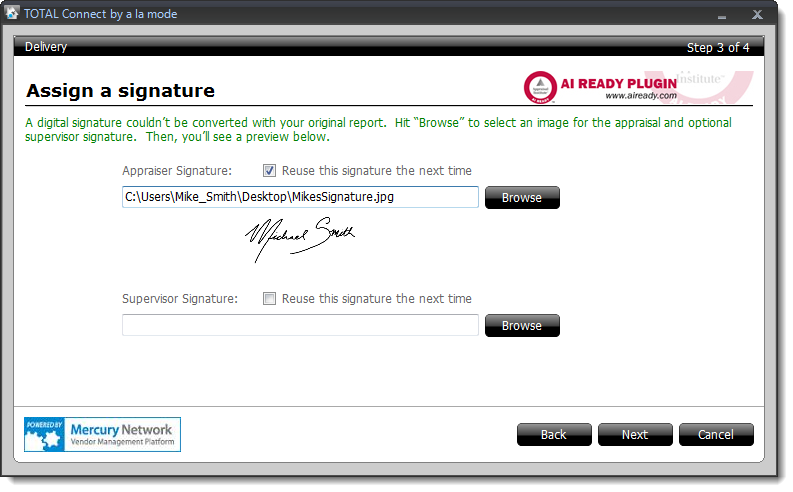
- In some cases, the delivery wizard is unable to convert your digital signature. If this screen appears, click Browse to locate and manually attach your digital signature file (and the supervisor signature if necessary). Check the box to Reuse this signature the next time to avoid this step the next time you deliver and click next.
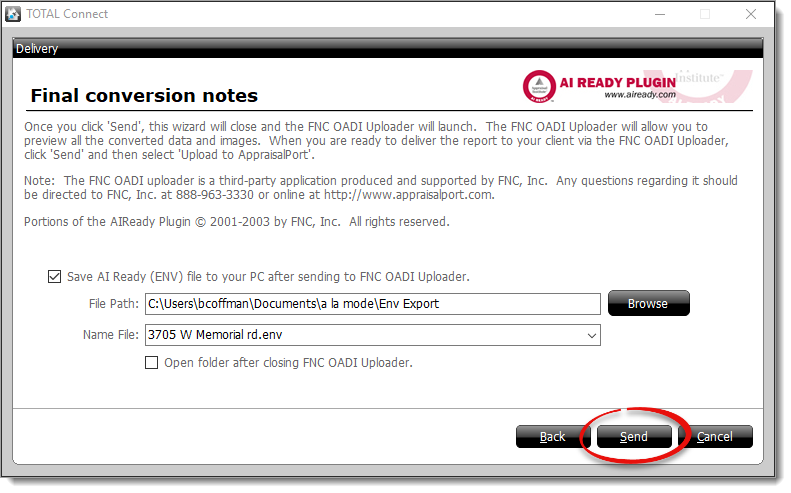
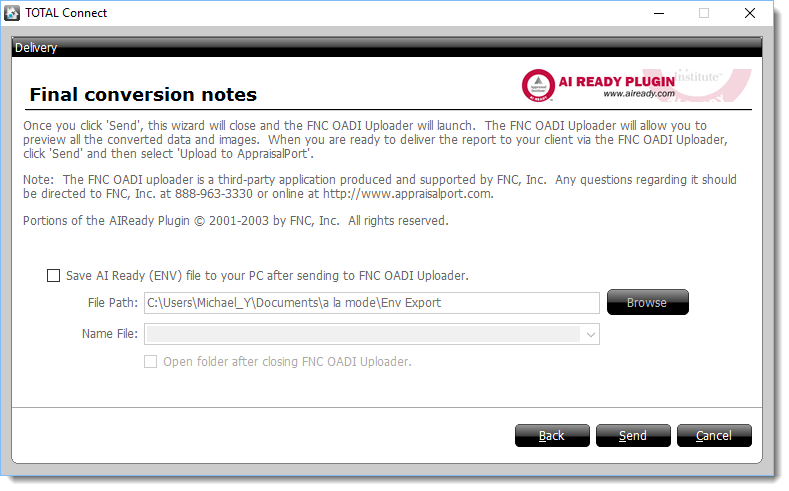
- Click Send on the Final conversion notes screen to convert your report to AI Ready format and open it in the OADI Viewer.
To save an ENV file to your PC, check the box for Save AI Ready (ENV) file to your PC after sending to FNC OADI Uploader and click Browse to choose a save location.
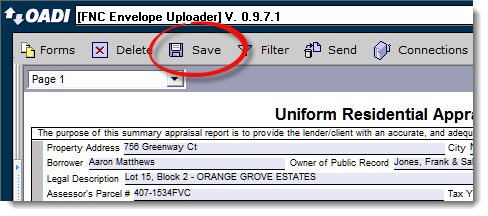
- When FNC's OADI Viewer appears, review each page of the report. When you're ready, click Save at the top of the screen.
- In the window that appears, browse to the location, or select from the drop down menu at the top. Make sure this is a location you can find easily, like your Windows Desktop or My Documents folder.
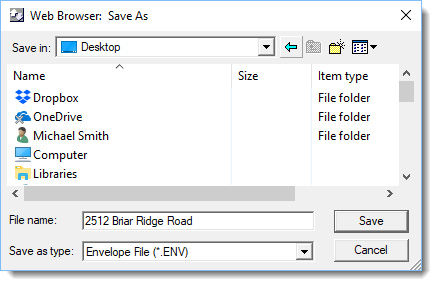
- Once you've selected where you want to save the file, enter a File Name and click Save.
- When you're finished, close out of the OADI Viewer.
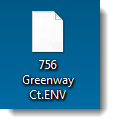
That's it! Your report is now saved in .ENV format and is available for you to upload to a website or attach it to an e‑mail.
.ENV File Creation from other formfillers
- Begin by generating a MISMO XML file from your formfilling software and save it to a convenient location on your computer (like your Windows desktop). This is the same type of file that you create when delivering your report in UAD Compliant format. If you're not sure how to do this, contact your formfilling software provider for assistance.
- Once you have generated your MISMO XML file, open TOTAL Connect by going to Start, [All] Programs, then expand the TOTAL Connect folder, and click TOTAL Connect to launch the program. If you have a TOTAL Connect shortcut on your desktop, you can also double-click that to open the program.

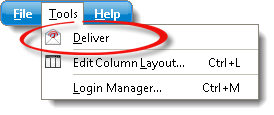
- When TOTAL Connect has loaded, click Tools on the upper left and select Deliver.
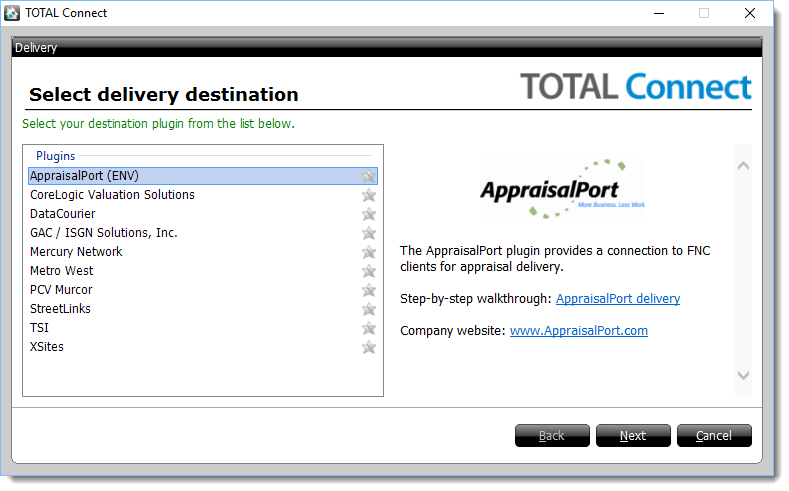
- In the Select delivery destination window, select AppraisalPort, and click Next.
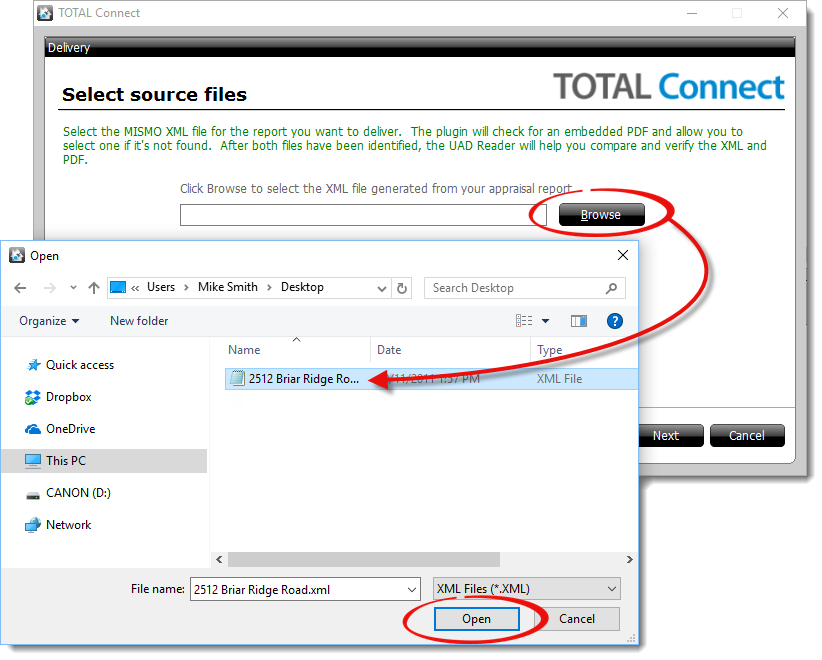
- Click Browse to locate the MISMO XML file you created in Step 1. Once you've located the file, select it and click Open.
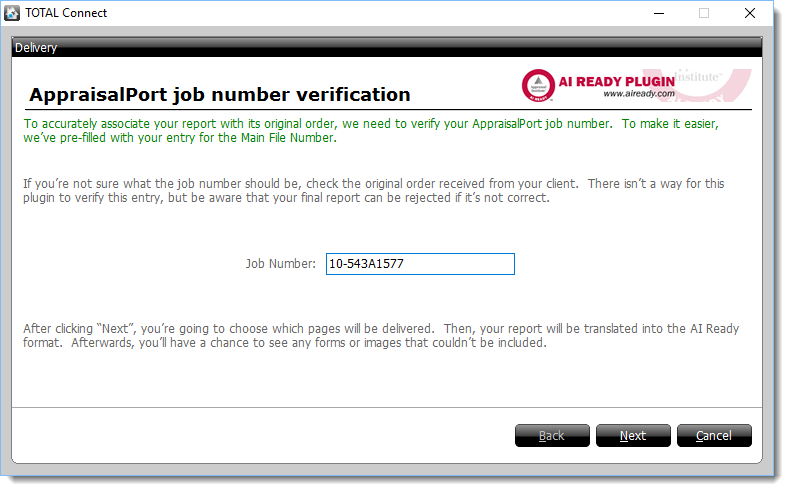
- The next window prompts you for a Job Number and is populated with the report's Main File Number (if available). If the field is blank or you need to change the job number, adjust it as necessary, and click Next.
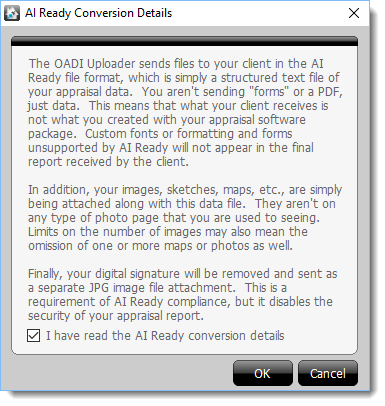
If this is your first time delivering to AppraisalPort, you're prompted to confirm that you have read the AI Ready Conversion Details. Check the box on the lower left, and click OK to proceed.
- On the following screen, you're presented with a list of forms in your report:
- Choose the pages you want to include in your report and click next. Any pages marked Incompatible are not included in the converted report. If a compatible form is found in TOTAL, this screen gives you the opportunity to swap the form by clicking SWAP Click here for a complete list of compatible forms.

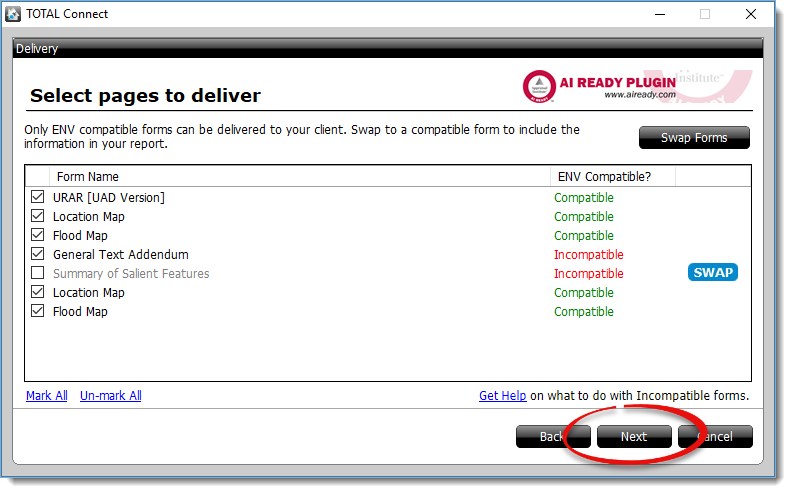
Review the information, select or deselect the necessary forms, and click Next.
Click here to view instructions on Getting started, Best Practices, and Common questions regarding AppraisalPort delivery. - Choose the pages you want to include in your report and click next. Any pages marked Incompatible are not included in the converted report. If a compatible form is found in TOTAL, this screen gives you the opportunity to swap the form by clicking SWAP Click here for a complete list of compatible forms.
- In some cases, the delivery wizard is unable to convert your digital signature. If this screen appears, click Browse to locate and manually attach your digital signature file (and the supervisor signature if necessary). Check the box to Reuse this signature the next time to avoid this step the next time you deliver, and/or click Next to proceed.
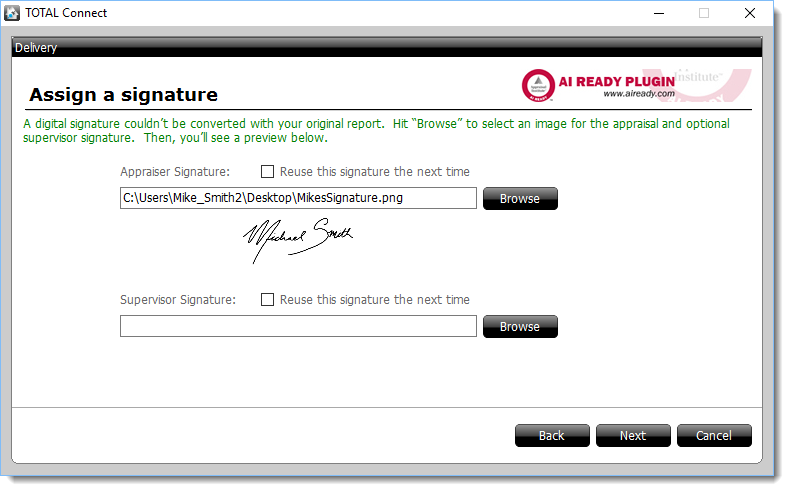 If you're seeing this screen each time you deliver, check your signature in your formfiller. AppraisalPort supports only JPG formats for images, including your digital signature. If necessary, convert your signature to a JPG format and apply that as your signature.
 - In the final step of the delivery wizard, review the details about what to expect after you click Finish. The rest of the delivery process is handled by software developed by FNC called the OADI Viewer, so this step is simply informational. When you're finished reviewing the information, click Send.
- When FNC's OADI Viewer appears, review each page of the report. When you're ready, click Save at the top of the screen.

- In the window that appears, browse to the location, or select from the drop down menu at the top. Make sure this is a location you can find easily, like your Windows Desktop or My Documents folder.

- Once you've selected where you want to save the file, enter a File Name and click Save.
- When you're finished, close out of the OADI Viewer.
That's it! Your report is now saved in .ENV format and is available for you to upload to a website or attach it to an e‑mail.
If your client or lender requires the FHA/VA Case Number to be printed on every page, it must be entered as either the Main File Number or Other File Number when delivering to AppraisalPort. Click here for more information.
