As you continue to post to your blog, over time you may establish a
readership. If you own a copy of our XSellerate
marketing tool which couples with your XSite, you can offer a way for those
readers to subscribe to your blog by email. When someone subscribes to your
blog, you receive their valid contact information in exchange for an automatic
email any time you post to your blog again.
The process is simple.
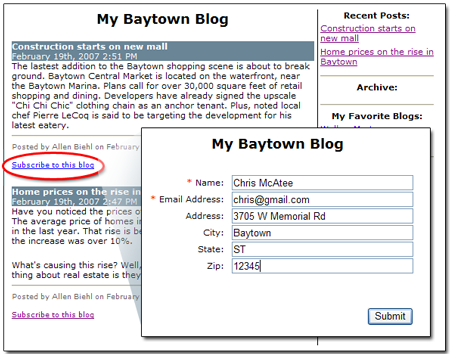
- When customers read your blog, a Subscribe to this blog
link appears beneath each post.
- When they click this link a form appears, where they can fill out their
contact information. While only their Name and
email address are required, they can provide additional
information as well.

- Once they click Submit their information is placed in
your XSite's Contacts database and
they receive a confirmation email message. From that point forward, each time
you post to your blog,
XSellerate sends them an email notification, with a brief summary of the post
and a link back to your blog for the full post.
While the subscription feature in your blog is primarily an opt-in tool, you
are also free to enroll (or remove) contacts you select from your XSite address
book. To do so:
- Hover over XSite in the top toolbar and click
Blog in the toolbar that drops down.

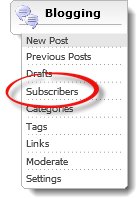
- Click Subscribers in the Blogging pane
on the left.

- Then, do one of the following:
- To add a subscriber — Select the contact in the
Available Recipients list on the left and click the green
arrow (
 ) to add them to the
Selected Recipients list, or just double-click that
contact.
In addition to individual contacts, you can also add entire Groups
and contact types to your Blog subscription. Click the
Groups or
Type of Contact headers in the
Available Recipients list to display these contacts. For
more information on creating
Groups, consult the
Contacts section of this
guide.
- To remove a subscriber — Select the subscriber in
the Selected Recipients list on the right and then click
the blue arrow (
 ) to remove them from your blog
subscription service.
- Then, scroll down and click Save.
While your blog subscription tool uses a default email template whenever
someone subscribes to your blog, you should take a moment to customize the
template to your business. To customize your blog subscriber email template:
- Hover over XSite in the top toolbar and click
Blog in the toolbar that drops down.

- Click Subscribers in the Blogging pane
on the left.

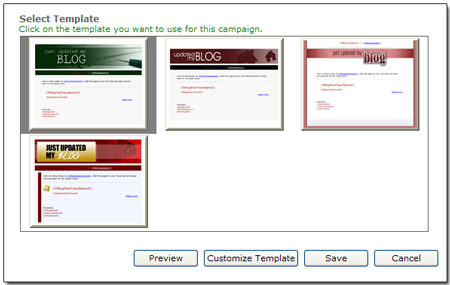
- Scroll down to the Select Template section of the screen
and click the desired template style to select it.

- Click Customize Template to open the XSellerate Content Editor. From here, you
can add your own touches to the standard message.
- Click Preview to see how your Blog notification will
appear to your subscribers.
- Click Save to lock in your changes.


 ) to add them to the
Selected Recipients list, or just double-click that
contact.
 ) to remove them from your blog
subscription service.

