Assign seats

Follow the instructions below to assign a seat to a user in your office, and allow them access to your files stored in Titan Drive:

If you're unfamiliar with seats and how they work, click here to read our Titan Seats FAQ. Or, click here for detailed information and use our Titan Seats Calculator to help you determine exactly what your office needs.
  1. Log in to www.TitanAppraisal.com.
  2. Hover over the User Settings menu on the upper right, and select Users and Accounts from the drop‑down menu.

  3. Review the information in the All users pane on the left. Next to each user's name, a checkmark is displayed in each column where a seat has been assigned for that product.

  4. Select the user profile with a Remote License where you want to assign a seat from the list of users.
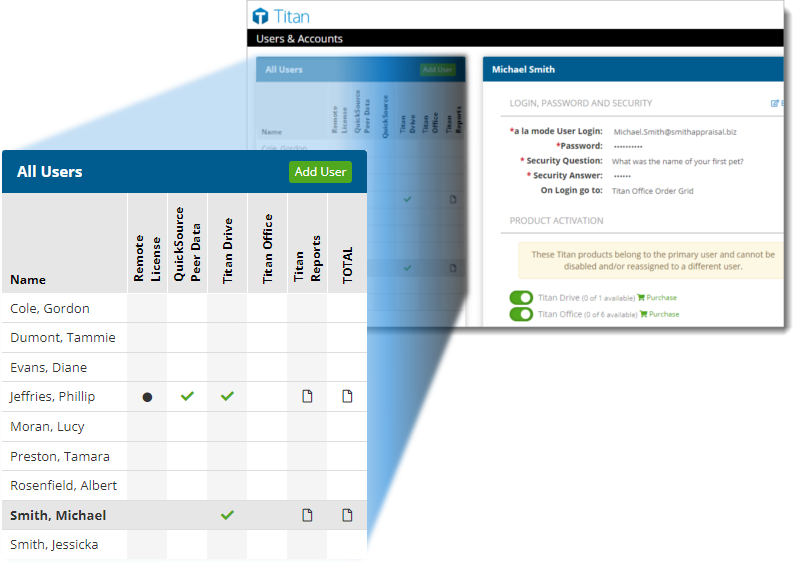
    Titan Drive seats can only be assigned to users with a remote license — in other words, people who have their own support contract and typically work off‑site. Click here for more information about remote licenses.
  5. In the Product Activation section, toggle the switch next to Titan Drive to assign a seat to this user. When a seat is assigned, the color of the switch changes to green.

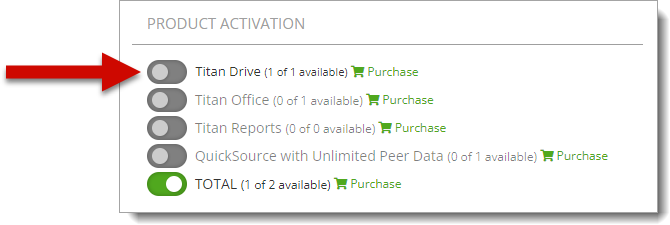
    To unassign a seat from a user, simply follow the same instructions and toggle the switch next to Titan Drive again. When a seat is unassigned, the color of the switch changes to gray.

That's it! As soon as you toggle the product activation switch, your changes are automatically saved, and a checkmark appears in that product's column for the selected user.