Appraiser's Guide to using PropertyAssist
This document walks you through the process of using PropertyAssist from the perspective of the appraiser.
Document 1502 | Last updated: 05/01/2020 MJY
PropertyAssist is a new, free tool to help keep you safe and working during this unprecedented time. Under the temporary changes to the appraisal process announced by Fannie Mae, Freddie Mac, and HUD, PropertyAssist allows you to keep your social distance and continue to work. Now, you can conditionally decline onsite inspection orders and let the property owner know that you'll accept under the new COVID‑19 guidelines. PropertyAssist helps you streamline your process in three ways:
- It provides guidance to the homeowner on where and how to take the pictures so that you don't have to spend time on the phone, in email, or sending messages back and forth to direct each shot.
- It gets assurances from the homeowner that the pictures are current and for the property being appraised. Otherwise, they can't submit.
- Pictures and data easily flow into your digital Workfile so that you can easily drag photos into your report, and they're saved in your Workfile if questions arise later.
Follow the instructions below to generate a URL and send it to the homeowner so that they can begin collecting photos and data:
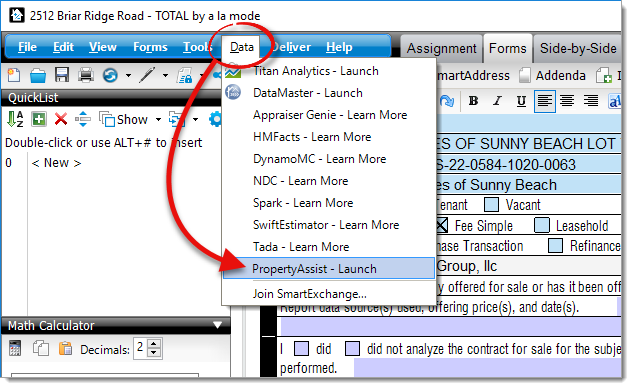
- With the report open in TOTAL, make sure the subject address has been entered. Then, click Data in the menu on the upper left, and select PropertyAssist from the drop‑down menu.
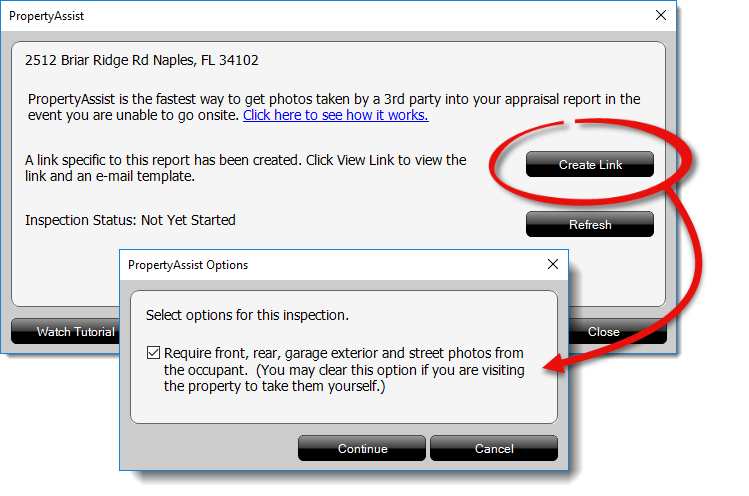
- Click Create Link, choose whether or not you want the homeowner to take exterior photos, and click Continue to generate the unique URL for this property.
If you uncheck the box to indicate you don't want the homeowner to take exterior photos, PropertyAssist removes the image slots for Exterior Front, Exterior Street, Exterior Rear, and Parking photos.
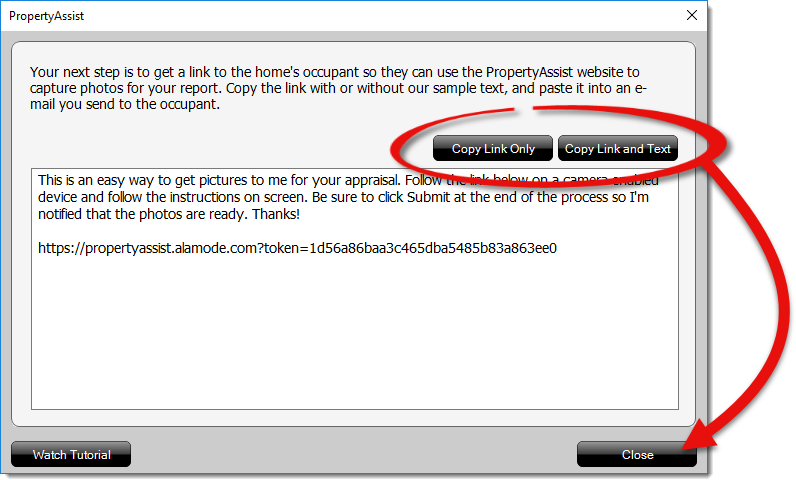
- In the window that appears, click Copy Link and Text to copy both the URL and the message template. Or, click Copy Link Only to copy just the URL that was generated and compose a custom message. Once you've copied the link and/or text, click Close.
- Open a new email message in your preferred email client, paste the message template and/or URL, and send it to the homeowner. At this point:
- The homeowner receives the link and begins gathering photos and data. Click here to view the homeowner workflow.
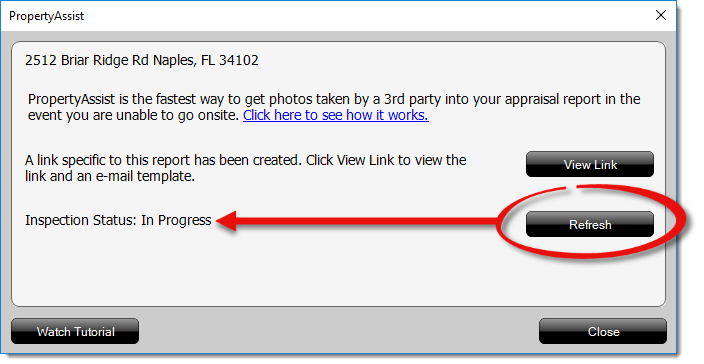
- To view the status and check the homeowner's progress, click Data in the menu on the upper left, select PropertyAssist, and click Refresh.
- When the homeowner is finished and submits the photos and data, an email notification is sent to you.
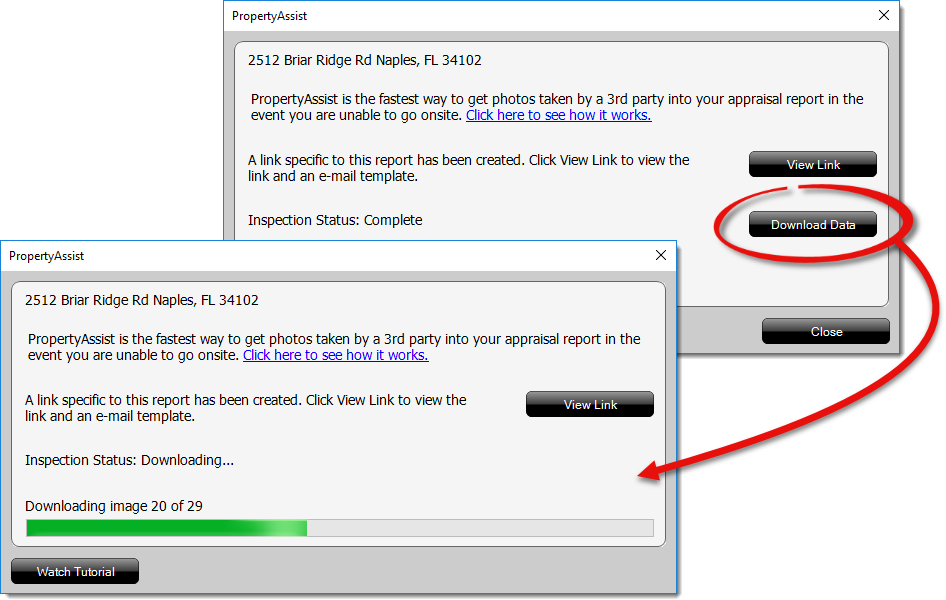
- When you receive the email notification, open the report that corresponds to the address in the notification, click Data in the menu on the upper left, select PropertyAssist, and click Download Data.
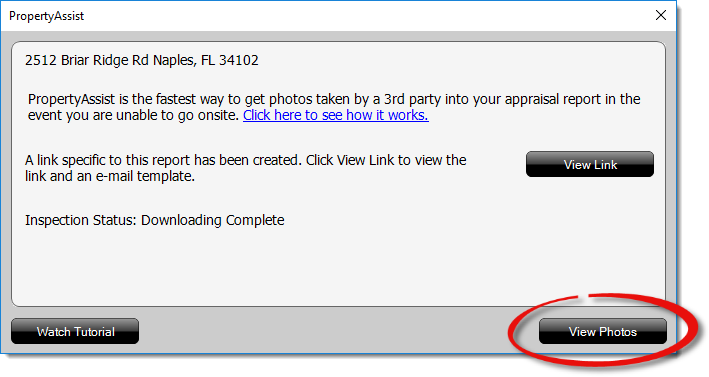
- When it's finished downloading, click View Photos to go straight to the Images in Workfile tab in the Photos PowerView.
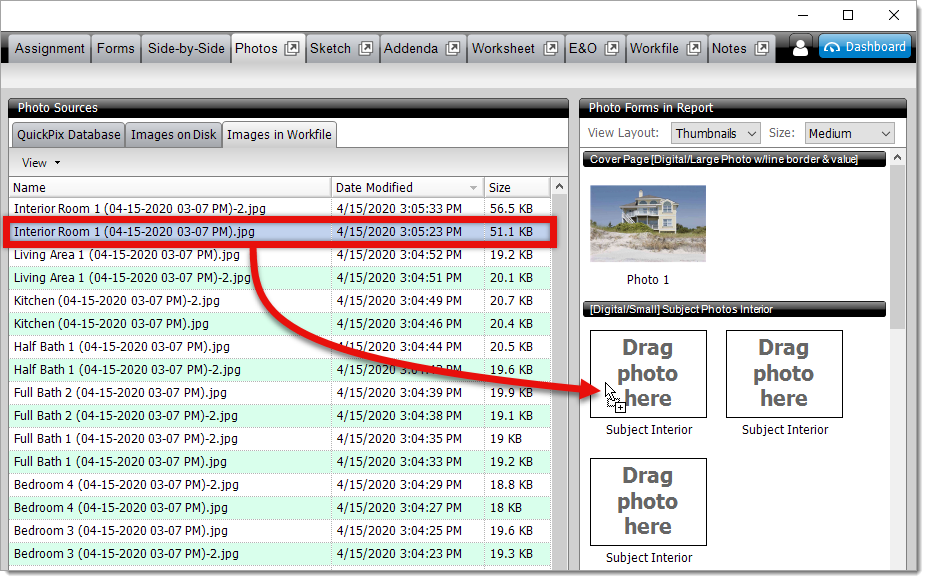
- Drag and drop the homeowner's photos from the Images in Workfile tab to the forms in your report in the Photos PowerView.
To view a complete list of all of the photos, comments, and any associated data that was downloaded, go to the Workfile PowerView and select the PropertyAssistSummary HTML file that was downloaded.
