Draw Exterior Walls |
||
There are several different ways you can draw exterior walls in TOTAL for Tablet PC. When drawing with a keyboard and mouse, we recommend using the keyboard as the primary method of input. While it is possible to do point to point sketching with a mouse in TOTAL for Tablet PC, it's generally more complex than completing the same sketch with the keyboard. To draw exterior walls with a keyboard and mouse in TOTAL for Tablet PC:
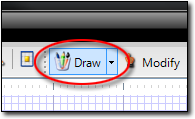
- In a sketch, click the down arrow beside the
Draw button in the toolbar or select the
Draw panel at the right side of the screen and select
Exterior Walls. Or, if you're already in Draw mode, hit the
X key on your keyboard to select Exterior Walls.

- Click your sketch to place a starting point for your new exterior wall.
- Using the keypad or numbers across the top of your keyboard, enter the
length (in feet) of the line and then hit the arrow reflecting the direction
of the line. As necessary, you can tap the directional arrows on your keyboard
to nudge the placement of the end point for your line to fine tune its
placement.

Note: If you're placing a diagonal line, you simply enter the rise and direction followed by the run and direction (or vice-versa) before placing the line. For instance, if you want to enter a rise of 4 ft up and a run of 3 ft right, you'd type 4, up, 3, right, Enter to place the line.
- When the line is set, hit Enter on your keyboard to set the line.
- Repeat this process for any additional walls. As you do, take note of the
visual cues that appear in the interface to assist you in drawing. Visual cues
include:
- Line Colors - Line colors correspond to the angle of
the line. Green lines indicate that the line is vertical. Teal lines
indicate that the line is horizontal. Red lines indicate that the line is at
45 degrees from the line to which it's attached.


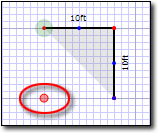
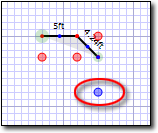
- Dot Colors - As you sketch, a variety of large dots may
appear around your line. Red dots indicate a standard "pop point." Blue dots
indicate a specialty pop point. Pop points assist you in sketching by
jumping to specific points on your sketch. The red pop points indicate end
points for your line that line up with other intersections in your sketch.
Blue pop points indicate that you can draw a line with a mirrored angle to
one that you've recently drawn (as with bay windows, for instance). For more
details on pop points, see the Pop Points topic
of this user's guide.


- Pulsating Dots - The pulsating dots that appear at the
end of a line indicate that the line is open on the pulsating end.

- Line Colors - Line colors correspond to the angle of
the line. Green lines indicate that the line is vertical. Teal lines
indicate that the line is horizontal. Red lines indicate that the line is at
45 degrees from the line to which it's attached.
- As you draw, TOTAL for Tablet PC automatically places the dimension labels
for each line. To toggle the dimension label from inside to outside of the
line or vice-versa, just press Alt + R on your keyboard
before drawing your next line.

Hint: If you want to draw your entire sketch and toggle the labels after it is complete you CAN select multiple wall lines in Modify mode after you've drawn your sketch and toggle them all simultaneously with Alt + R. - When you're ready to close the area, draw the last line or tap the A key on your keyboard to auto-close the area.
- If you've configured TOTAL for Tablet PC to do so, you're prompted for an area definition. Enter the areas details and click OK to save the area.

Other brand and product names are trademarks or registered trademarks of their respective owners. © CoreLogic | a la mode technologies, llc | Terms of Use | Privacy Policy |