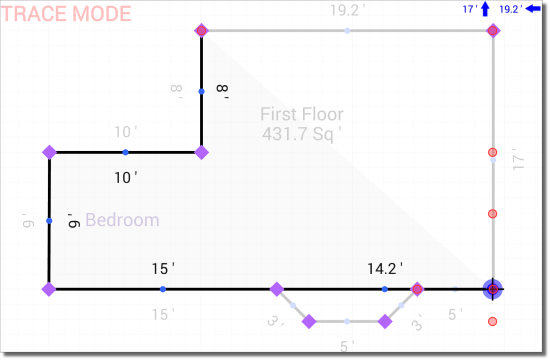
When you're in Trace Mode, the Trace to key appears on your sketch keyboard. When enabled, Trace to allows you to trace the outline of the original area from your starting point (where your starting point is currently anchored) to the corner point you select, and trace all of the lines in between. Using the trace to function eliminates a lot of unnecessary taps when portions of the new area you're tracing are exactly the same as the original area.
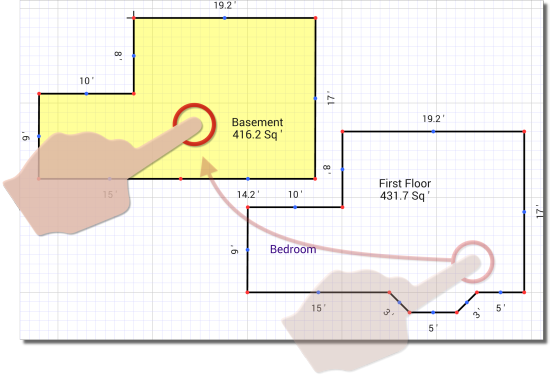
Let's say you have a basement area similar to the image below, minus the bay window. Follow the instructions below to trace to another corner point on your sketch:
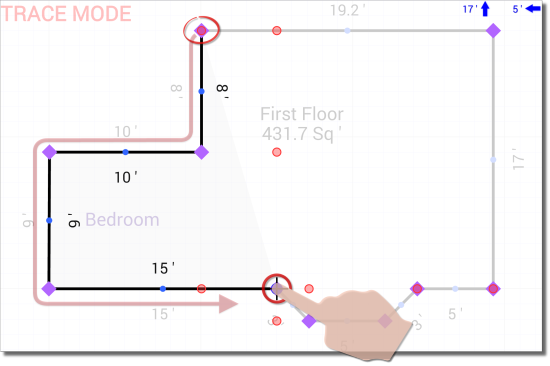
 ) on the upper left to
activate Trace mode. When you do, the original area becomes slightly "grayed
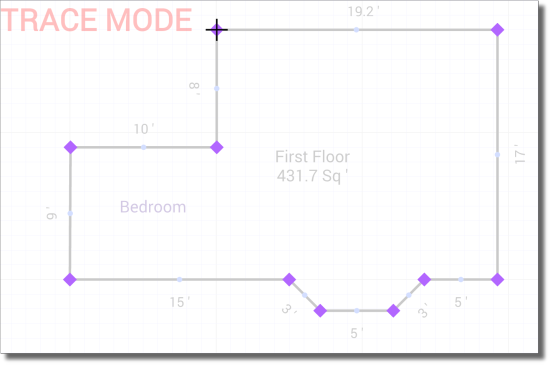
out", the words TRACE MODE appear in red on the upper left,
and purple corner points (
) on the upper left to
activate Trace mode. When you do, the original area becomes slightly "grayed
out", the words TRACE MODE appear in red on the upper left,
and purple corner points (  ) appear in each corner
of the original area.
) appear in each corner
of the original area.
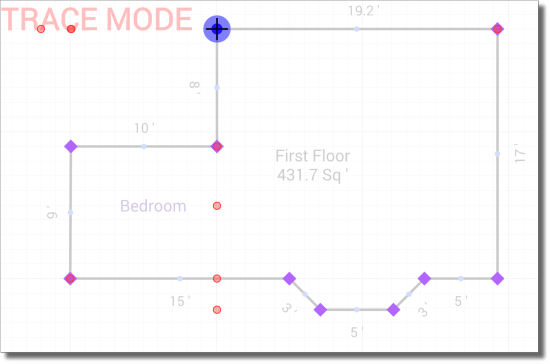
By default, TOTAL for Mobile is set to stay in Place Cursor mode after placing the cursor on the sketch canvas. Click here for information on changing these settings to automatically switch to Draw mode after placing the cursor to eliminate a few extra taps.
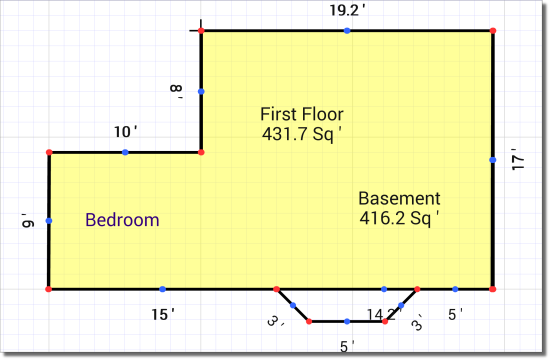
The new area is autonomous from the original area and you can move the new area independently from the rest of the sketch. Tap and drag the new area to a new location on the sketch canvas.