Using 3rd-party email with your XSite's domain
This document explains how to set up a third-party email host with your XSite.
Document 7206 | Last updated: 02/12/2021 MJY
There are two options to choose from when setting up your custom email: email forwarding and email hosting. If you already know which one you want to use, click here to skip ahead and select your preferred method.
Email Forwarding
Email forwarding allows you to forward emails from your domain (your‑website‑name.com) to an email address that you already use, like a Gmail account. Think of it like setting up a forwarding address at the post office. The post office intercepts any mail sent to the original address and automatically reroutes it to the new address. This method is free and easy to set up in the XSite Wizard.
When using email forwarding, emails sent to the email address associated with your website are automatically forwarded to your third‑party email account. When you reply to the email, the reply shows your third‑party email address as the "From" address.
If this is the method you prefer, click Email forwarding below.
Email Hosting
Alternatively, if you sign up with an email hosting service, it gives you a few additional benefits for a nominal monthly fee. One of the biggest benefits of choosing an email host like G Suite™ or Microsoft Exchange is that it allows you to use your XSite's domain when sending and receiving mail instead of only when receiving mail.
With this method, emails sent to info@your‑website‑name.com use the same address when you reply.
If this is the method you prefer, make sure you have an account set up with your preferred third‑party email hosting service, and click Email hosting below.
Click here to compare email providers
Compare common email providers:
| Gmail | G Suite | Microsoft Exchange |
Email forwarding | |
|---|---|---|---|---|
| How much does it cost? | Free | Starts at $6 | Starts at $4 | Free with XSite |
| Storage capacity? | 15GB | Starts at 30GB | 50GB per mailbox | N/A |
| Can I use my custom domain? | No | Yes | Yes | Yes |
| Supports mobile devices? | Yes | Yes | Yes | N/A |
| Calendar included? | Yes | Yes | Yes | N/A |
| Cloud storage? | Yes | Yes | Sold separately, free options available | N/A |
| Setup instructions | Gmail Setup | G Suite Setup | Exchange Setup | See below |
| Contact their support | Gmail Support | G Suite Support | Exchange Support | 1‑800‑ALAMODE |
Follow the steps below to set up email forwarding:
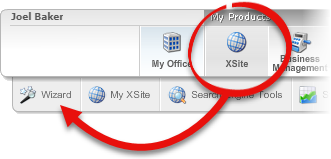
- Log in to the Admin section of your XSite, hover over the XSite button, and choose Wizard.

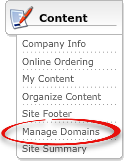
- Click Manage Domains in the Content pane on the left.

- Under the Your E‑mail Hosting heading, locate your domain name, choose Email Forwarding from the dropdown, and click the Set up email forwarding link to launch the E‑mail Forwarding Setup wizard.
 If you receive a message stating "This domain is not managed by a la mode", contact your domain registrar to change your email hosting settings instead of doing it through your Appraiser XSite.
 - Enter both the Public e‑mail address to which customers send messages, and Where e‑mail arrives, where the messages will be forwarded.

- When you're finished, click Save.
That's it! You now have a business email address forwarding to your third‑party email.
If you've chosen to go with a third‑party email hosting service, we've made it easy to enter all of the necessary settings to point your email to the correct place. Make sure you've created an account with your preferred third‑party email provider first, and then follow the steps below.
- To begin, log in to the Admin section of your XSite, hover over the XSite button, and choose Wizard.

- Click Manage Domains in the Content pane on the left.

- Under the Your E‑mail Hosting heading, locate your domain name, choose your email hosting service from the E‑mail Host dropdown, and click the Click to edit link to launch the E‑mail Host Setup wizard.
 If you receive a message stating "This domain is not managed by a la mode", contact your domain registrar to change your email hosting settings instead of doing it through your XSite.
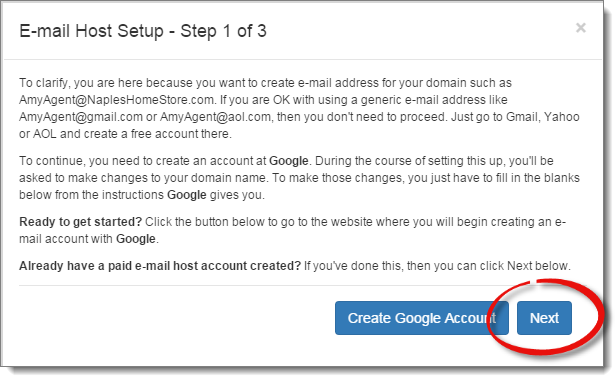
 - When the E‑mail Host Setup wizard launches, follow the directions on screen and click Next.

- In Step 2 of the wizard, you're asked to verify your domain for the third‑party email company. There are a few different ways to accomplish this, which vary based on the email host you chose:
- Adding a TXT (text) record
- Adding a CNAME record
- Adding a <meta> tag to your home page
To verify your domain, choose the method that corresponds with your email host's preferred method, and then follow the instructions on screen. When you're finished, click Verify Domain to continue. Please note, this can take anywhere from a few minutes to an hour or more to complete.
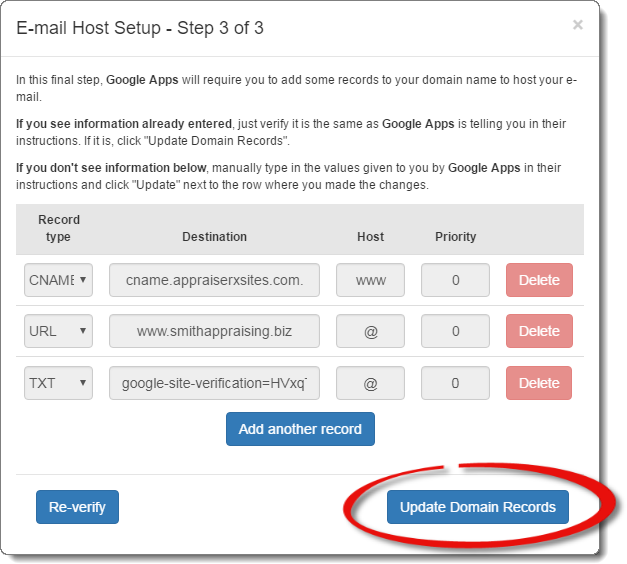
If you need assistance with the verification process, send an email to ALMDomains@CoreLogic.com. - Once your domain is verified, you're presented with step 3 of the E‑mail Host Setup wizard. Enter any custom DNS records — MX, CNAME, and TXT records — that your email host has given you. Enter this information exactly as it's given to you to avoid any issues sending or receiving emails.

Once you've entered your DNS information, click Update Domain Records.
That's it! You're now able to configure your new inbox to send and receive emails. If you have any problems, review the DNS records you entered in Step 3 of the E‑mail Host Setup wizard. If this doesn't correct the issue, contact our support team at 1‑800‑ALAMODE.