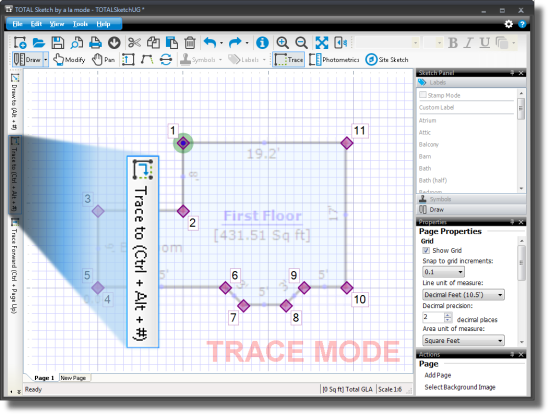
Trace Mode's Trace to feature allows you to trace the
outline of the original area from your starting point (where your starting point
is currently anchored) to the corner point you select, and trace all of the
lines in between. Using the trace to function eliminates a lot of unnecessary
steps when portions of the new area you're tracing are exactly the same as the
original area.
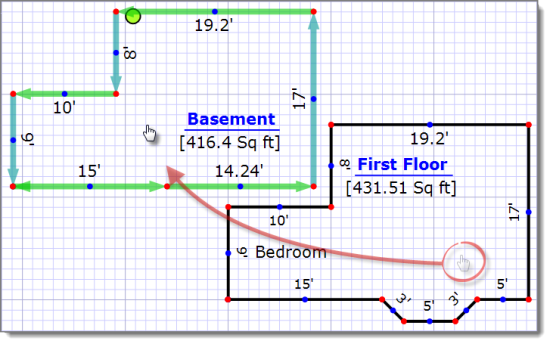
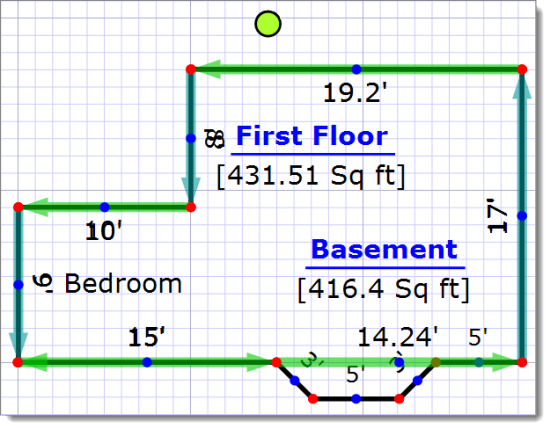
Let's say you have a basement area similar to the image below, minus the bay
window. Follow the instructions below to trace to another corner point on your
sketch:
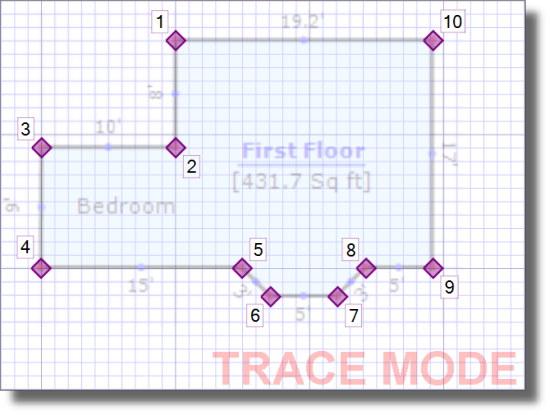
- Click the Trace icon (
 ) in the toolbar at the top to
activate Trace mode. When you do, the original area becomes slightly "grayed
out", the words TRACE MODE appear in red on the lower right,
and purple corner points (
) in the toolbar at the top to
activate Trace mode. When you do, the original area becomes slightly "grayed
out", the words TRACE MODE appear in red on the lower right,
and purple corner points (  ) appear in each corner of the
original area.
) appear in each corner of the
original area.
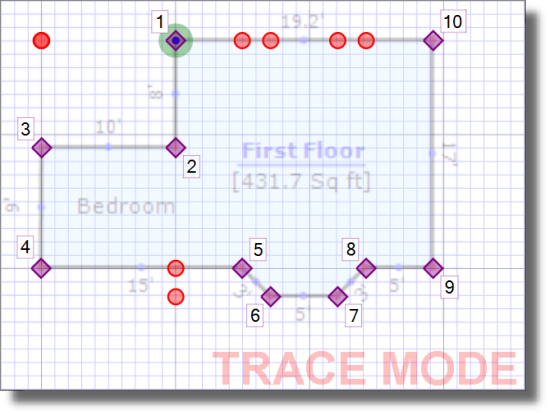
- Next, position your cursor where you'd like to begin. In our example,
we're starting from the corner on the upper left. You can also press
Alt+# to jump to that corner point
(Alt+1 in our case), or position your cursor
close to that point and press the letter J on your keyboard
to jump to the nearest point. Now, press Enter to anchor your
starting point.
- Now you're ready to trace to another point on your sketch. Ensure that Draw Area line mode is selected, if
TOTAL Sketch doesn't switch to it automatically. If you're tracing the area in
a clockwise motion, you can press
Ctrl+Alt+# on your keyboard
(Ctrl + Alt + 8 in our
example) to quickly trace to another point in your sketch, but you can also
trace to another point in a counterclockwise motion. Click the Trace
to button on the left to open the Trace to dialog.
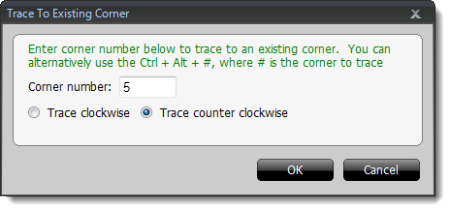
- In the dialog that appears, type the number that corresponds to the corner
point you want to trace to (corner point #5 in our example), select
Trace counter clockwise, and click OK.
- After clicking OK, TOTAL Sketch traces the outline of the
original area from point A to point B, including all of the lines in between.
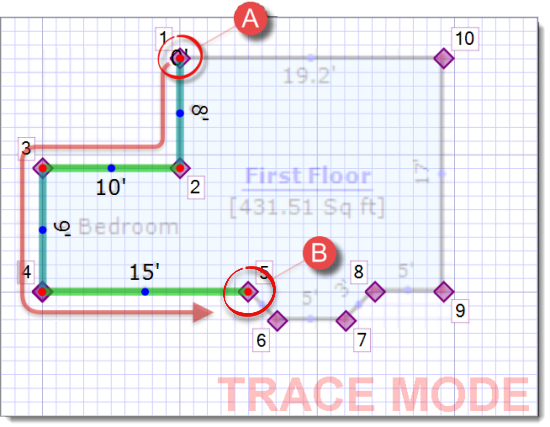
If you find that you didn't trace quite far enough, or if you accidentally
traced too far, hold down your Ctrl key and press
Page Up or Page Down on your keyboard to
trace forward one step, or trace backward one step, respectively. In our
example, tracing forward would extend the line from corner point 5 to 6, or
tracing backward would take us back from corner point 5 to 4. Press
Enter when you're ready to anchor the end point of this
line.
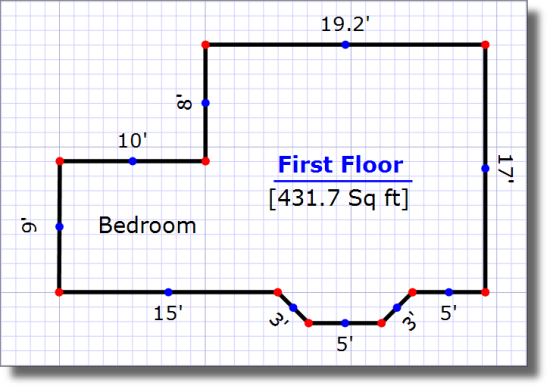
- Continue to Draw area lines
corresponding to the new area's dimensions to finish tracing.
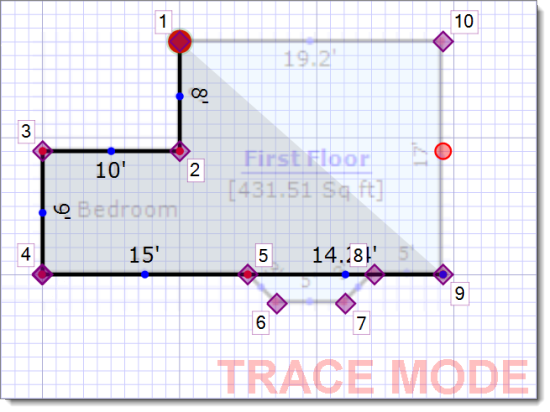
- When you close the area (this happens automatically when the area line
you're drawing meets the existing area line, effectively "closing" the area),
notice that TOTAL Sketch attempts to detect the type of area you just
sketched. If it detected the wrong area type, simply select a different area type from the list on the
left.
- After you select the area type, you're returned to the sketch where the
new area is situated on top of the original area.
The new area is autonomous from the original area and you can move the new area
independently from the rest of the sketch. Click and drag the new area to a
new location on the sketch canvas.