Custom Room Labels |
||
As necessary you can customize the room labels available in TOTAL for Tablet PC's Room Analysis and sketching tools. There are two ways you to customize your room labels:
- Through TOTAL for Tablet PC's Room Analysis tool
- Through TOTAL for Tablet PC's sketcher. This option only works with a mobile PC like a tablet.
Customizing Room Labels from Room Analysis |
||
To customize TOTAL for Tablet PC's room labels from TOTAL for Tablet PC's Room Analysis tools:
- With a file open in TOTAL for Tablet PC, click the Data tab.
- In the Data tab, click the Room Analysis tab.
- Click the Add a Room button to create a new room or choose one of the existing rooms in your file to edit it.
- In the screen that appears, click the Edit Rooms button to the right of the Room Description field.
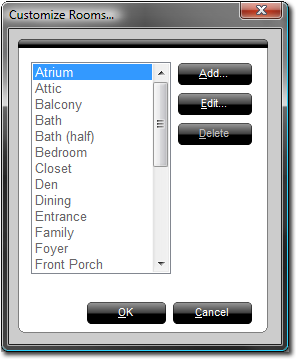
- From the list that appears, you can add, delete, and rename each label.
- To add a new label, click Add, enter a new label name and click OK.
- To edit an existing labile, select the label you wish to edit and click Edit. Then, change the room label and click OK to save your changes.
- To remove a custom label from the list, select the label you wish to
remove. Then, click Delete.

- When finished, click OK to save all of your changes.
Customizing Room Labels from Sketch |
||
To customize TOTAL for Tablet PC's room labels from TOTAL for Tablet PC's sketcher:
- With a file open in TOTAL for Tablet PC, click the Sketch tab.
- In the Sketch tab, click the Labels tab in the Sketch Panel to the right.
- At the bottom of the list, click the Edit List item.
- From the list that appears, you can add, delete, and rename each label.
- To add a new label, click Add, enter a new label name and click OK.
- To edit an existing labile, select the label you wish to edit and click Edit. Then, change the room label and click OK to save your changes.
- To remove a custom label from the list, select the label you wish to
remove. Then, click Delete.

- When finished, click OK to save all of your changes.

Other brand and product names are trademarks or registered trademarks of their respective owners. © CoreLogic | a la mode technologies, llc | Terms of Use | Privacy Policy |