
Before you begin your scan, enable Do Not Disturb mode on your device — phone calls or app switching ends the scan. Then, plan your scanning route to optimize scanning time and accuracy. It's best to reserve the longest wall or the wall with the most obstructions as the last wall so that you don't need to walk the length of it.
Check out the animation on the rightabove for an overview of the process. You can also click the animation, or click the play button on the video below to watch the full best practices video.
Once you've planned your route and enabled Do Not Disturb mode, go to your first corner and follow the instructions below to begin using ScanToSketch:
 ) in the toolbar at the top, and
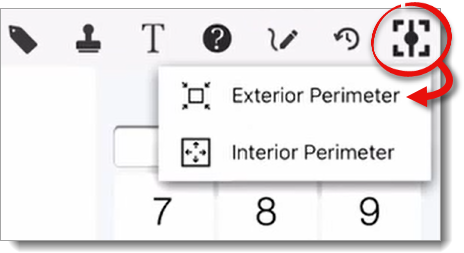
select Exterior Perimeter.
) in the toolbar at the top, and
select Exterior Perimeter.
 ) to place a corner marker.
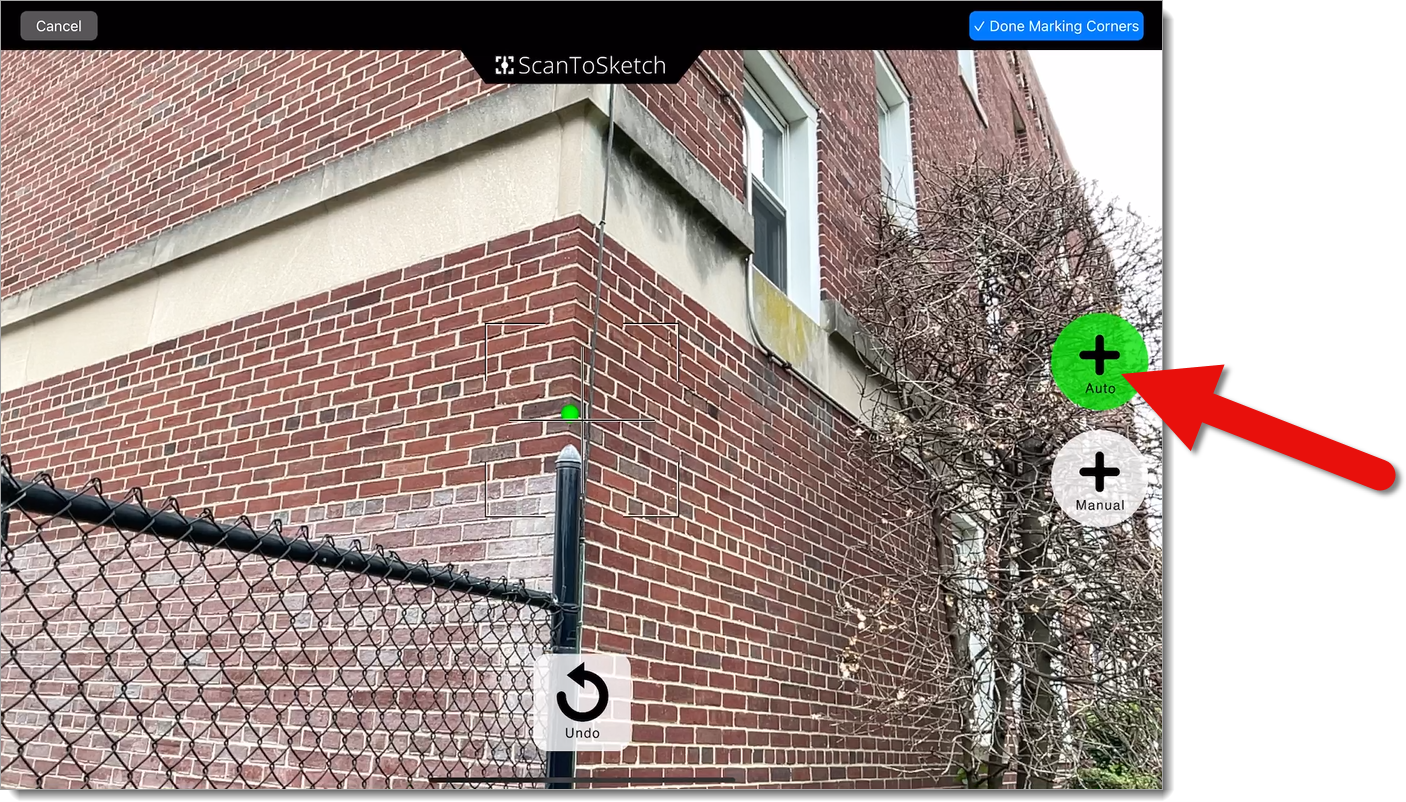
If the green dot appears in the wrong location or doesn't appear at all, adjust your position and/or the angle of the device to capture more of the structure's walls. Move the crosshairs slowly to the left and right, up and down, closer and further, and then back to the corner. Pointing the device at the ground or at another corner and back also helps with detecting the corner.
Alternatively, you can manually place a corner point by aiming the crosshairs exactly at the corner and tapping the white Manual button (
). However, we recommend using the green Auto corner markers whenever possible.

If you make a mistake or place a corner marker in the wrong location, press the Undo button () to remove it and try again.
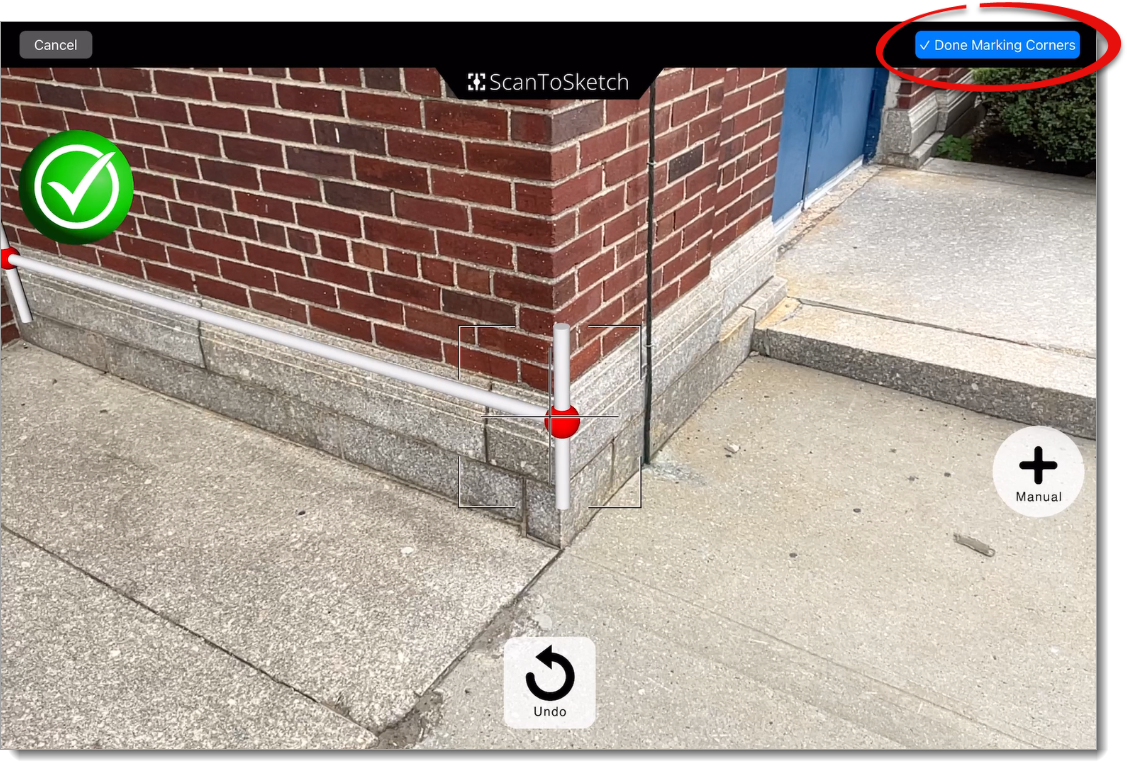

That's it! Once you've exported the scan to your sketch canvas, verify the sketch as needed with public records, spot check or remeasure difficult areas, and then edit, stitch, and merge the elements of your sketch to fine‑tune it as necessary.