Trace Mode's Draw to feature allows you to extend an
individual line from where your beginning point is anchored to any other corner
point or pop point on the sketch canvas. To use the Draw to feature:
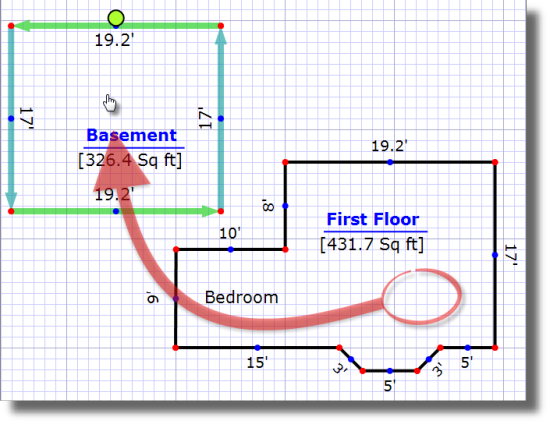
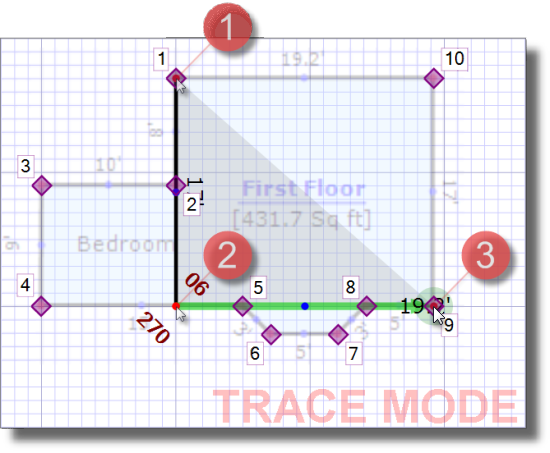
- Let's say you have a basement area similar to the image below, minus the
bay window and the bedroom on the left. Since you've already completed the
basic shape of the basement with your first floor area, use the existing area
to trace your basement.
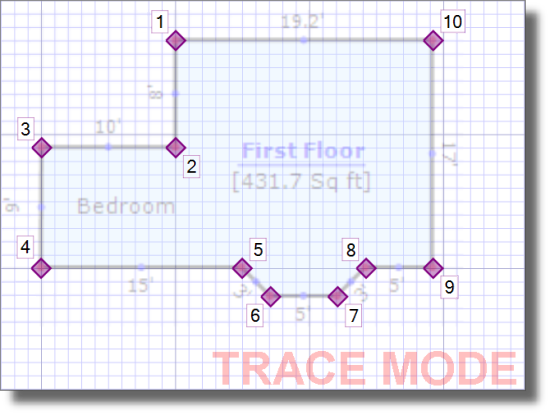
- Click the Trace icon (
 ) in the toolbar at the top to
activate Trace mode. When you do, the original area becomes slightly "grayed
out", the words Trace Mode appear in red on the lower right,
and purple corner points (
) in the toolbar at the top to
activate Trace mode. When you do, the original area becomes slightly "grayed
out", the words Trace Mode appear in red on the lower right,
and purple corner points (  ) appear in each corner of the
original area.
) appear in each corner of the
original area.
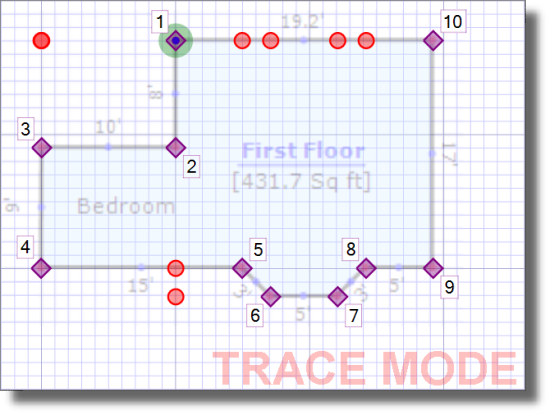
- Next, position your cursor where you'd like to begin. In our example,
we're starting from the corner on the upper left. You can also press
Alt+# to jump to that corner point
(Alt+1 in our case), or position your cursor
close to that point and press the letter J on your keyboard
to jump to the nearest point. Now, press Enter to anchor your
starting point
- Now you're ready to begin tracing. Ensure that Draw Area line mode is selected, if TOTAL Sketch
doesn't switch to it automatically. Then, trace the basement area. When using
the Draw to feature, there are two ways to draw area lines:
- Alt + #
- The quickest way to trace individual lines is to simply hold down the
Alt key on your keyboard, and then type the number that
corresponds to the corner point where you wish to extend your line.
- Ctrl + Directional Arrow
- If the area you're drawing has common, "squared" points that match the
original area, hold down the Ctrl key on your keyboard and
press a directional arrow to extend a line from your starting point to the
nearest corner point ( ) or pop point (
 ) in that direction.
- Line Length and Directional Arrow
- If the area you're drawing deviates from the original area, or if you
need a little more precision with your area lines, you can also type the
length of a line and press an arrow key to indicate the direction of the
line.
- Continue to Draw area lines
corresponding to the new area's dimensions to finish tracing.
- When you close the area (this happens automatically when the area line
you're drawing meets the existing area line, effectively "closing" the area),
notice that TOTAL Sketch attempts to detect the type of area you just
sketched. If it detected the wrong area type, simply select a different area type from the list on the
left.
- After you select the area type, you're returned to the sketch where the
new area is situated on top of the original area.

The new area is autonomous from the original area and you can move the new area
independently from the rest of the sketch. Click and drag the new area to a
new location on the sketch canvas.