Add licenses, signatures, and seals

To add a license, signature, and seal for your Titan Reports user:

  1. With a report open in Titan Reports, click Tools, and select Options from the drop‑down menu.
  2. Select Signatures on the left. Then, select a user from the list of Users.
  3. If you've already created a license for this user, select it and click Edit. Otherwise, click Add to create a new license.

  4. Enter the user's license or certification information, and then click Add Signature.

  5. Now, browse to your digital signature image on your PC. Select the file, and then click Open.

  6. In the screen that appears, click and drag the handles (gray squares) that appear around the perimeter to crop the image and eliminate as much whitespace as possible. When you're finished, click Crop, and then click OK.

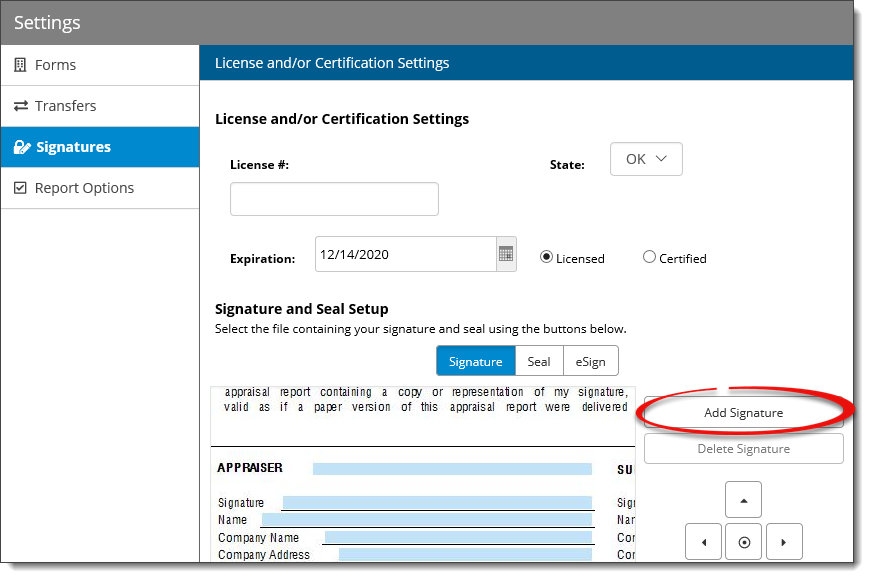
    If your signature is too large to be adjusted appropriately, you may need to resize the image in an editing program like Paint or Photoshop.
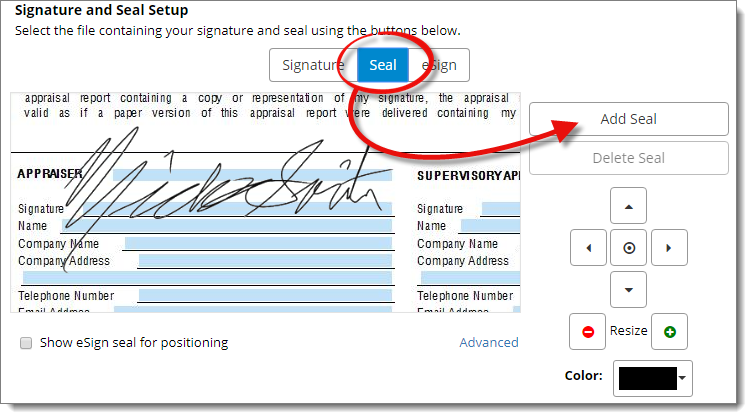
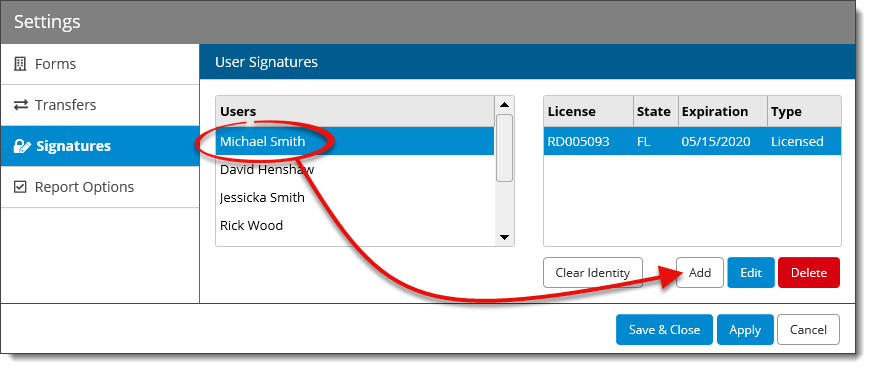
  7. Your signature now appears in the preview pane on the left. Click and drag the signature image to position it on the signature line.
  8. To add a state seal to your signature, click the center Seal button and click Add Seal on the right. Then, follow the instructions starting from Step 4 to browse for and add your seal image to your signature.

  9. Once you're satisfied with the appearance of your signature and/or seal, click OK, and then click Save & Close to save your changes and return to Titan Reports.
Each Titan Reports user is limited to a single license and certification per state. To add more than one license or certification for the same state, you'll need to purchase an additional seat and assign it to a new user for each additional license or certification. Click here for more information and to buy additional seats.