Add report

The reports in Accounting offer unlimited customization and can be run from anywhere.

  1. In Accounting, click Reporting in the toolbar on the upper left.
  2. Now, click Create Report.
    Click Copy to the right of an existing report to duplicate that report and use it as a starting point.
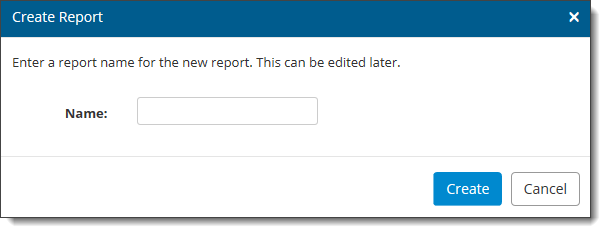
  3. Enter your report name and click Create.

  4. Use the Available Fields pane on the left to add fields to the Fields in Report pane on the right side, by clicking the arrows in the center of the screen.
  5. When you’re finished adding fields, use the up and down arrows to arrange the sequence of the fields.
  6. To customize an item, click to select it in the list and edit the name in the Title field below, then click Update. To reset to default, click to select the field from the list then, click Restore.
  7. The Filters pane is where you limit the data included in your results.
  8. Click the link to Add a new filter. As an example, you might want to limit your report to the current month’s invoices. To do so, you’d choose Date Invoiced from the drop‑down box, and choose Between in the adjacent drop‑down. Then, you would pick the first and last dates of the current month from the final boxes. Click Save to add your new filter to the report. You can filter by multiple criteria, so you can even have a report customized for dates and a single client.
  9. If you’d prefer to have your report prompt you for information each time you run it, click the Prompt option that appears. In our example, clicking these options would cause the report to prompt you for the invoice date range each time you run the report.
  10. Scroll to the Sorting pane to continue building your report. Here, you can sort the output by choosing the items from the primary, secondary and tertiary sort columns. For example, you might want to use the client’s company name as the primary sort item and then the client’s name as the secondary item so you can group together orders from different loan officers at the same company. Indicate if the sort should be ascending or descending.
  11. In the Grouping pane, choose the field by which you wish to group the output. Using the above example, you’d group by the company name.
  12. If you wish to count the report’s invoices by group or print each group to a separate page, indicate so by marking the corresponding boxes.
  13. Finally, click the Add a new summary in the Summaries pane and choose how you want to summarize the data. Generally, you’d choose a field and choose Subtotal, but there might be times when you want to average values or get a count. In the Summary types field, choose the type of summary you’d like to use and remember to select a field you want used in the summary from the Report fields drop‑down. Then, click Save.
  14. Finally click Save to save your report.

The report you created is now listed with your other reports.