Creating CSV files to import into XSites
This document outlines the process of exporting contacts from various contact management programs and creating a CSV file.
Document 7209 | Last updated: 09/27/2022 MC7
Before you can import contacts into your XSite or XSellerate, you need to export them into a CSV file. Click your preferred contact management software or e‑mail provider from the drop‑down menu below for specific instructions.
Click your contact software:
General Steps
- Export your contacts. From your email or contact management software, export (or download) your contacts as a Comma Separated Value (CSV) file. If you already have the file in another format, like an Excel (XLS or XLSX) file, you can simply save it as a CSV file type from within Excel.
- Make sure the column headings in your file are correct. Open your CSV file using a program such as Notepad or Excel, and ensure that the column headings for your data match the format shown in the list below.
- You don't have to use all of the following column headings. Only use the ones you need.
- There may be columns in your CSV file that don't match any of the following headings. Your XSite won't be able to import data in those columns.
- The order in which the headings appear in the CSV file doesn't matter.
- All headings are case‑sensitive and must match exactly.
Click here to download a blank template which contains all the usable headers for a CSV import.
- FirstName
- LastName
- MiddleName
- JobTitle
- Company
- Suffix
- Title
- HomeAddress1
- HomeAddress2
- HomeCity
- HomeState
- HomeZip
- HomeCountry
- BusinessAddress1
- BusinessAddress2
- BusinessCity
- BusinessState
- Fax
- BusinessZip
- BusinessCountry
- BusinessEmail
- BusinessEmailDisplayName
- MobileDeviceEmail
- MobileDeviceEmailDisplayName
- HomePhone
- BusinessPhone
- CellPhone
- Notes
- BirthDate
To export your Gmail contacts into a CSV file:
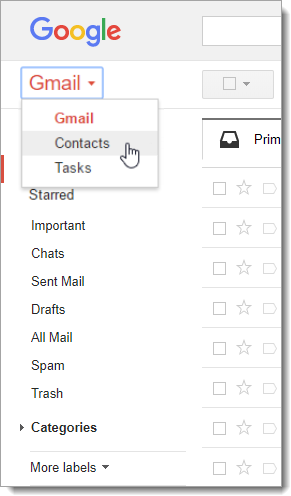
- Click Gmail in the upper left corner. Then, select Contacts.
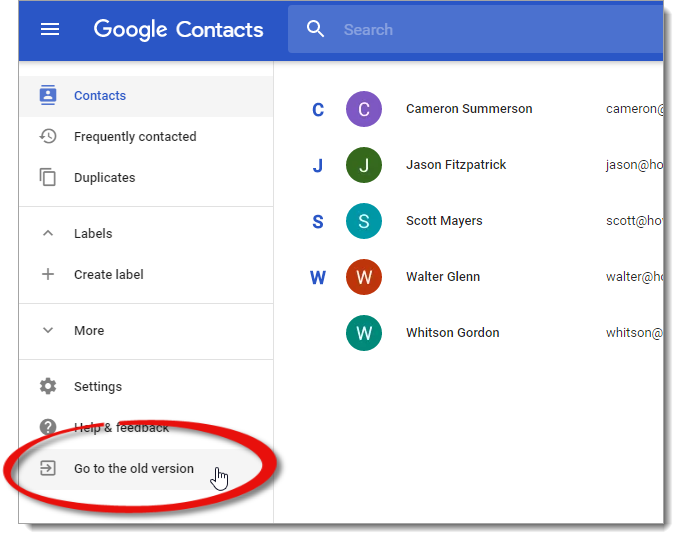
- On the left menu, select Go to the old version.
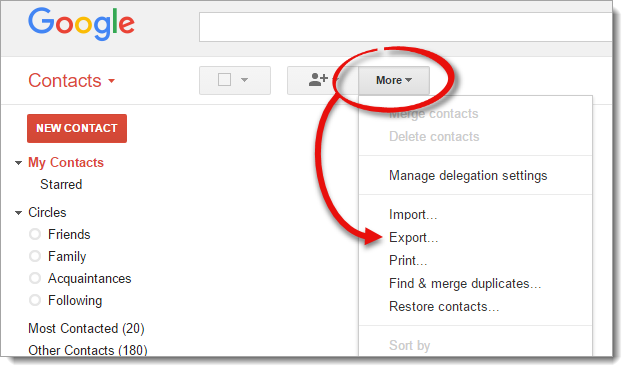
- Click More, then Export.
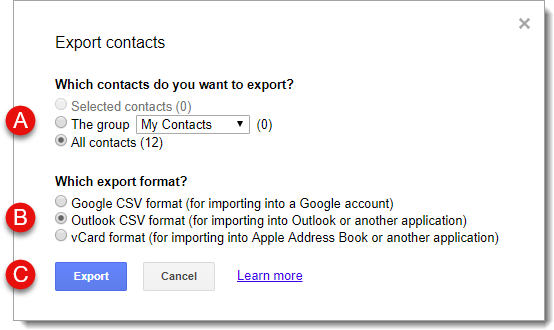
- Choose which contacts to download (A), select Outlook CSV format (B), and click Export (C).
 When naming your CSV file, don't use the word "contact" in the file name. This causes an error when importing contacts into your XSite.
Now, just import the contacts with the contact import tool provided in your XSite. For specific steps on the import process, see the Importing Contacts section of the XSites User's Guide.
All headings are case‑sensitive and must match exactly:
Click here to download a blank template which contains all the usable headers for a CSV import.
- FirstName
- LastName
- MiddleName
- JobTitle
- Company
- Suffix
- Title
- HomeAddress1
- HomeAddress2
- HomeCity
- HomeState
- HomeZip
- HomeCountry
- BusinessAddress1
- BusinessAddress2
- BusinessCity
- BusinessState
- Fax
- BusinessZip
- BusinessCountry
- BusinessEmail
- BusinessEmailDisplayName
- MobileDeviceEmail
- MobileDeviceEmailDisplayName
- HomePhone
- BusinessPhone
- CellPhone
- Notes
- BirthDate


Outlook 2016 and 2013
To export your Outlook contacts into a CSV file:
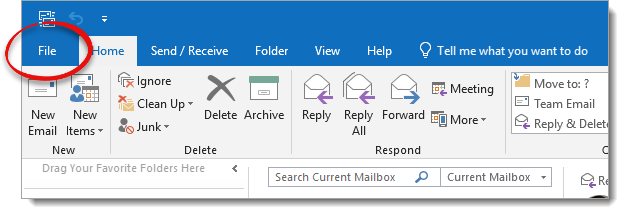
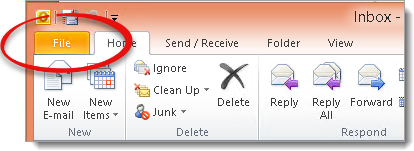
- With Outlook open, click File in the upper left.
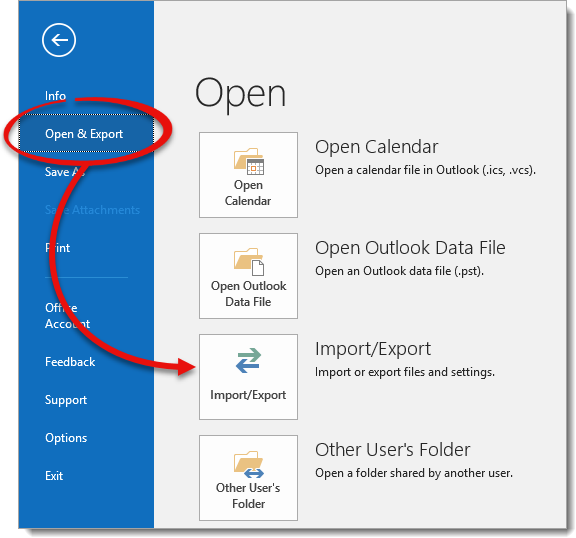
- Click Open & Export. Then, select Import/Export from the list of options.
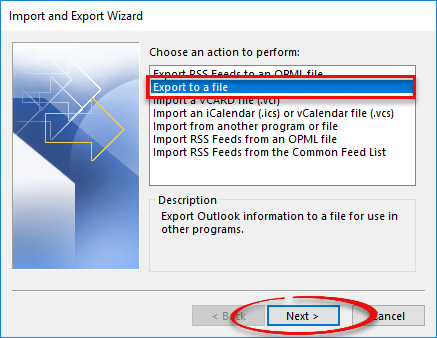
- Select Export to a file and click Next.
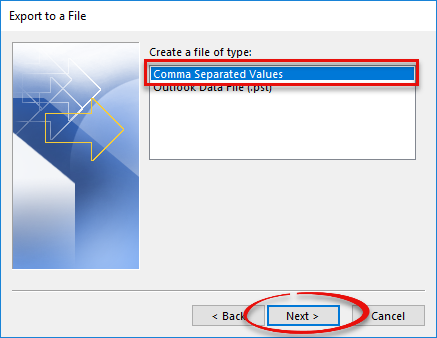
- Select Comma Separated Values and click Next.
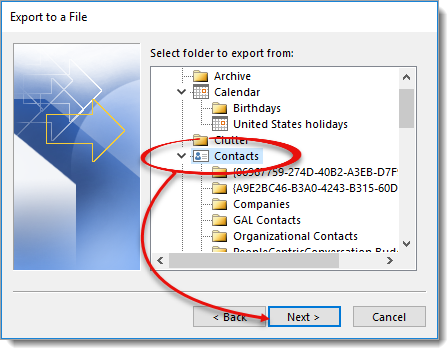
- Select a folder from the list that you want to export from. If you want to export all contacts, select Contacts and click Next.
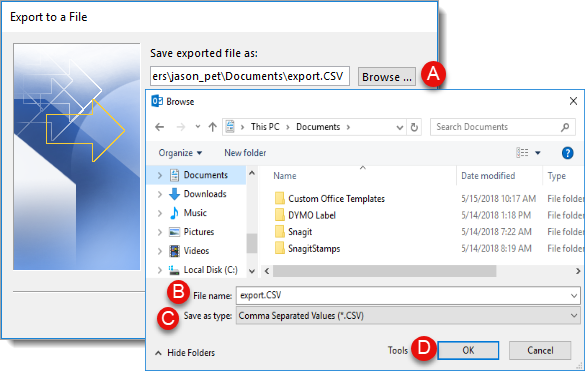
- Click Browse (A), enter a File name (B), make sure the Save as type is set to Comma Separated Value (C), and click OK (D).
 When naming your CSV file, don't use the word "contact" in the file name. This causes an error when importing contacts into your XSite.
 - Confirm where you want to save the export file. To choose a different location, click Browse. When you're finished, click Next.

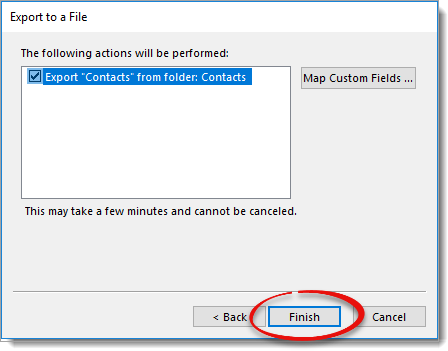
- Click Finish to export your contacts.
 Outlook doesn't display a confirmation messsage when the export process is complete. Instead, the Import and Export Progress window simply disappears.
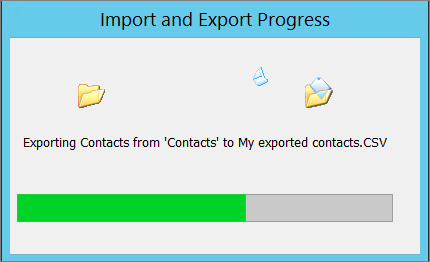
Outlook 2010
To export your Outlook contacts into a CSV file:
- With Outlook open, click File in the upper left.
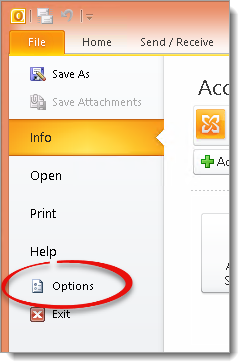
- Click Options.
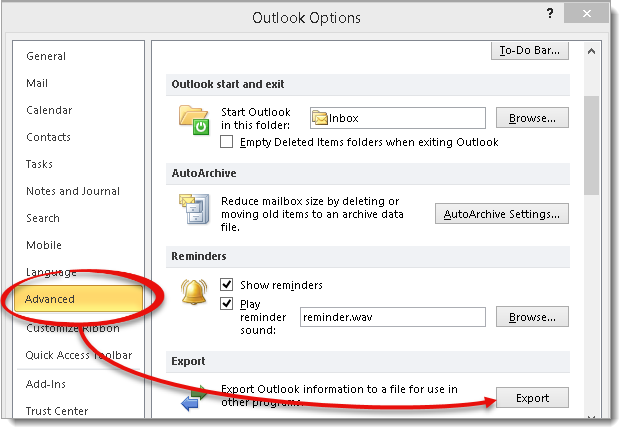
- In Outlook Options, click Advanced. Then, in the export section, click Export.
- Select Export to a file and click Next.
- Select Comma Separated Values and click Next.
- Select a folder from the list that you want to export from. If you want to export all contacts, select Contacts and click Next.
- Click Browse (A), enter a File name (B), make sure the Save as type is set to Comma Separated Value (C), and click OK (D).
When naming your CSV file, don't use the word "contact" in the file name. This causes an error when importing contacts into your XSite.
- Confirm where you want to save the export file. To choose a different location, click Browse. When you're finished, click Next.
- Click Finish to export your contacts.
Outlook doesn't display a confirmation messsage when the export process is complete. Instead, the Import and Export Progress window simply disappears.
Outlook 2007
To export your Outlook contacts into a CSV file:
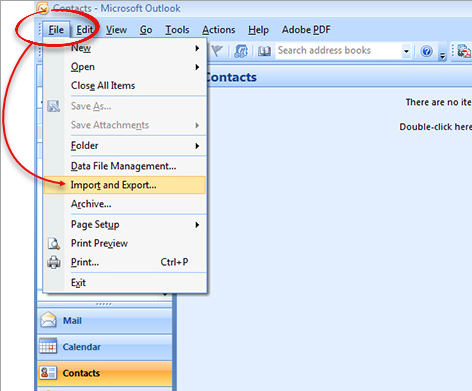
- With Outlook open, click File in the upper left and select Import and Export.
- Select Export to a file and click Next.
- Select Comma Separated Values and click Next.
- Select a folder from the list that you want to export from. If you want to export all contacts, select Contacts and click Next.
- Click Browse (A), enter a File name (B), make sure the Save as type is set to Comma Separated Value (C), and click OK (D).
When naming your CSV file, don't use the word "contact" in the file name. This causes an error when importing contacts into your XSite.
- Confirm where you want to save the export file. To choose a different location, click Browse. When you're finished, click Next.
- Click Finish to export your contacts.
Outlook doesn't display a confirmation messsage when the export process is complete. Instead, the Import and Export Progress window simply disappears.
Outlook creates a CSV file containing all of your contacts. Now, just import the contacts with the contact import tool provided in your XSite. For specific steps on the import process, see the Importing Contacts section of the XSites User's Guide.
All headings are case‑sensitive and must match exactly:
Click here to download a blank template which contains all the usable headers for a CSV import.
- FirstName
- LastName
- MiddleName
- JobTitle
- Company
- Suffix
- Title
- HomeAddress1
- HomeAddress2
- HomeCity
- HomeState
- HomeZip
- HomeCountry
- BusinessAddress1
- BusinessAddress2
- BusinessCity
- BusinessState
- Fax
- BusinessZip
- BusinessCountry
- BusinessEmail
- BusinessEmailDisplayName
- MobileDeviceEmail
- MobileDeviceEmailDisplayName
- HomePhone
- BusinessPhone
- CellPhone
- Notes
- BirthDate
To export your Windows Mail contacts into a CSV file:
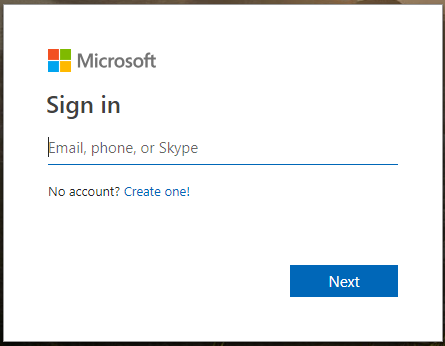
- Sign in to your Microsoft Account.
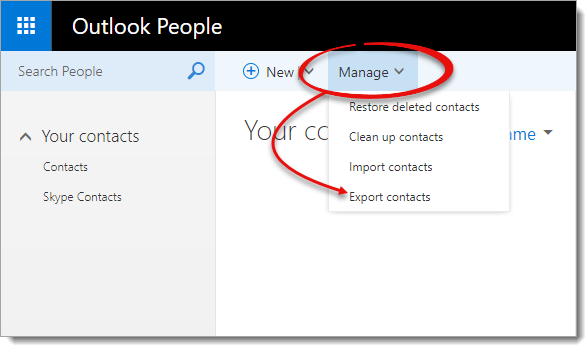
- Click Manage and select Export Contacts.
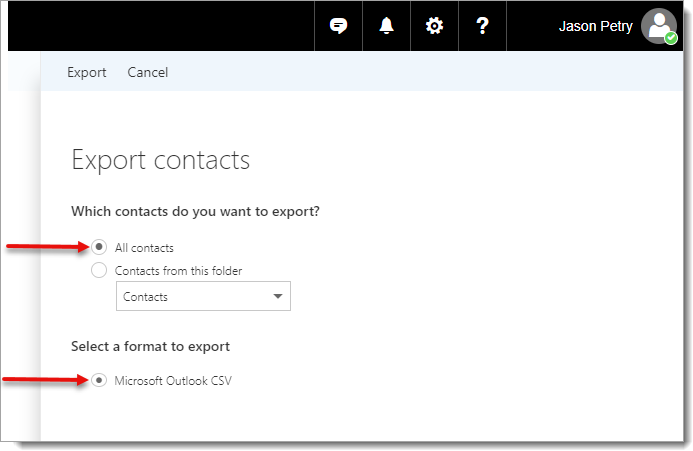
- In the menu that appears, select All contacts. Then, select Microsoft Outlook CSV.
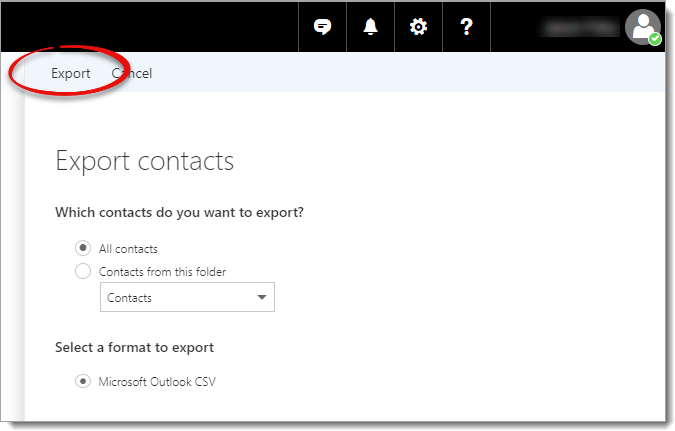
- Click Export. If prompted to save the file, save it to a convenient location such as your Windows desktop. Otherwise, the file is downloaded automatically.
- Right click the file you downloaded and select Rename. Then, change the name to something like windowsmail.csv.
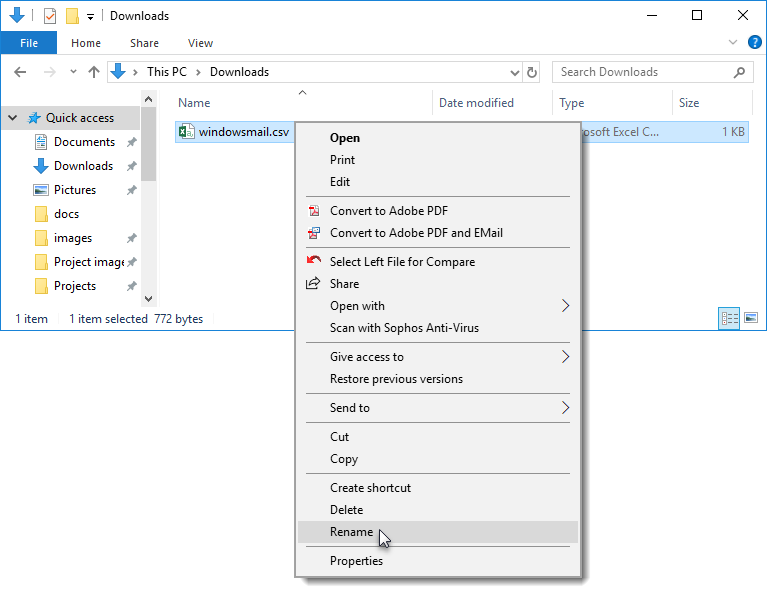 When naming your CSV file do not use the word "contact" in the file name. This causes an error when importing contacts into your XSite.
Windows Mail creates a CSV file containing all of your contacts. Now, just import the contacts with the contact import tool provided in your XSite. For specific steps on the import process, see the Importing Contacts section of the XSites User's Guide.
All headings are case‑sensitive and must match exactly:
Click here to download a blank template which contains all the usable headers for a CSV import.
- FirstName
- LastName
- MiddleName
- JobTitle
- Company
- Suffix
- Title
- HomeAddress1
- HomeAddress2
- HomeCity
- HomeState
- HomeZip
- HomeCountry
- BusinessAddress1
- BusinessAddress2
- BusinessCity
- BusinessState
- Fax
- BusinessZip
- BusinessCountry
- BusinessEmail
- BusinessEmailDisplayName
- MobileDeviceEmail
- MobileDeviceEmailDisplayName
- HomePhone
- BusinessPhone
- CellPhone
- Notes
- BirthDate