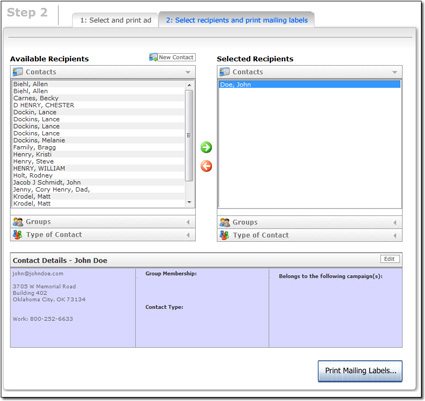
The last step in the printed mailing wizard is to select the
addressees for the mailing and print contact labels for each.
- On the left side is the list of available contacts, broken up by Contact,
Groups or Type of Contact. Click a header to view contacts of that type.

- Select all of the contacts, types, and groups you wish to include in your
mailing. To do so:
- Select a contact or group in the left window, and then click the green
arrow button.
- Continue adding individuals or groups using this same process.
- If you need to remove a contact from the list, select it in the window
on the right and click the red arrow button.
- Notice that as you click on a contact or group, the
Preview pane at the bottom of the screen gives you some
detailed information, and tells you in which campaigns this person or people
are already included.
- To edit a contact in the list, click to select the contact and then
click Edit in the Contact Details pane.
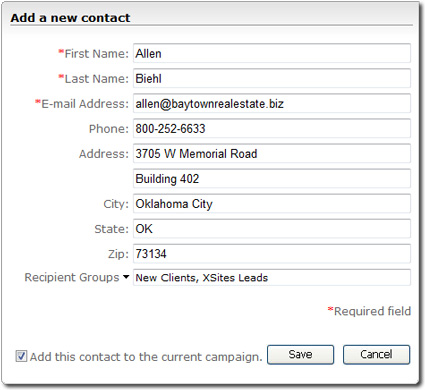
- If you want to add a contact that is not yet in your contacts database,
click the New Contact button. Type relevant contact
information check the box to indicate that you want to include this contact
in the current campaign. Then, click Save to create the
contact and add them to the campaign.

- Click Print Mailing Labels when finished.
- When the Print Labels screen appears, you can:
- Choose the type of Avery® labels on which you want to print using the
drop‑down menu.
- Require that the contact contains a full mailing address to print a
label for it so that you don't print labels you can't use for mailings.
- Print a custom label instead of labels from contacts
- Force the label printer to print a full sheet of your custom labels
- Choose the starting label on your label sheet by clicking the
corresponding cell in the preview page above the Preview
Labels button.
- When you're ready to print your labels, just click the
Print icon in the Label Preview pane to send
them to the printer.

