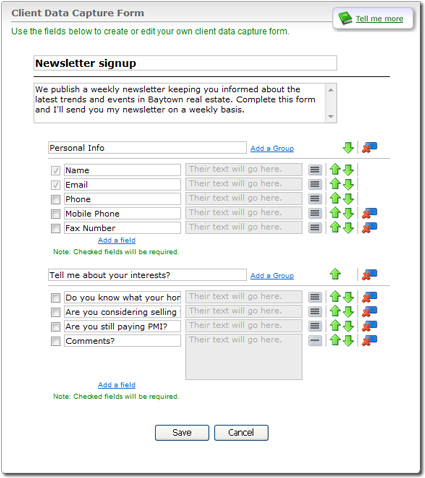
Explanations about why you need specific information or guarantees that you will respect the prospect's privacy have proven to boost Client Data Capture form effectiveness.
- Groups — Use groups to combine similar questions into sections on your form. To add a group, click one of the Add a Group links. Then, type a title for your group into the box provided.
- Fields — Use fields to ask your questions. Each Client Data Capture form includes three default fields, and additional fields can be added by using the "Please Choose:" drop down. All of the data entered into provided fields will be included in the contact that's generated when the Client Data Capture form is submitted.
 ) and multi-line (
  ) icons to the right of each
field.
) icons to the right of each
field.
 ) and down (
  ) arrows beside each group and
field.
) arrows beside each group and
field.
 ) to its right.