Creating Appointments

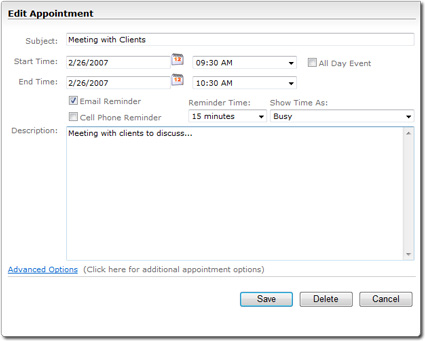
You can easily add appointments and activities such as inspections, showings, client meetings, and due dates through your site. To schedule a new appointment:

  1. From your schedule, click New Appointment in the top toolbar.
  2. Type a name for your appointment in the Subject field.
  3. Enter your Start and End times using the fields provided and indicate whether this is an All Day Event using the box to the right.
  4. Indicate whether you wish to receive an email or Cell Phone reminder and indicate how much lead time you want prior to the event using the Reminder Time drop‑down box.
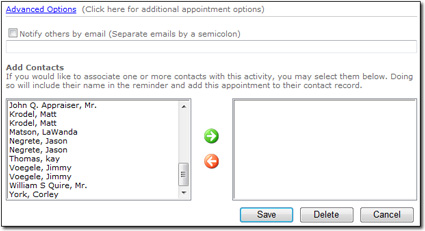
    Cell Phone reminders require that you've supplied your cell phone number and provider in your user profile. See the User Management section of this user guide for more information.
  5. Choose an activity type from the Show Time As drop‑down menu.
  6. If necessary, type any notes that apply to your new appointment in the available Description box.

  7. If you need to send email reminders to other parties as well as to yourself, click the Advanced Options link at the bottom of the screen and check the Notify others by email box.
  8. Type the email address(es) of the individuals you wish to send reminders to using the box provided.
  9. Alternatively, if you have the contacts in your database, just click their names in the list at the bottom and click the right arrow to add their contact to the appointment.

  10. Click Save when finished to save your new appointment.