When you enter or edit a contact, you're able to assign that contact to
groups. This allows you to direct your future marketing campaigns to a whole
group of contacts that meet certain criteria. A contact can be a member of
several groups, allowing you to fine-tune your marketing efforts for maximum
impact. For more details about using groups to manage new contacts you acquire
through your site, see the Client Data Capture section of this user's
guide. To build and manage your groups:
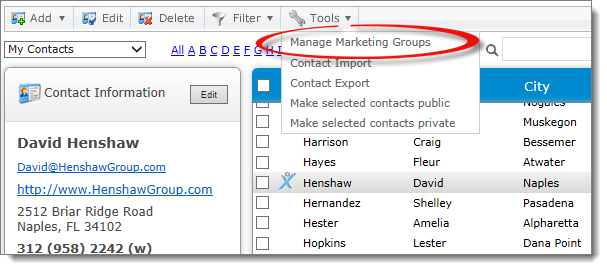
- In the contact manager, click
Tools in the contacts toolbar and select Manage
Marketing Groups from the drop‑down menu.

- In the window that appears, there are two types of groups:
- System Groups
- System Groups are the default groups that come with your XSite, such as
Blog Comments, Blog Subscribers, and XSite leads, and each System Group
shows how many contacts are associated with it. Because these groups are a
component of the XSite, they cannot be edited or deleted. To remove a
contact from a System Group, edit the groups in their contact details or
select a contact and adjust their groups via Groups and Types in the Marketing Activities pane.
- My Groups
- My Groups displays any custom groups you've created and the number of
contacts in each group.
- To create a new custom group, enter the Group Name in
the field at the bottom and click Save New Group. New
groups can also be created using Groups and Types in the Marketing Activities pane.

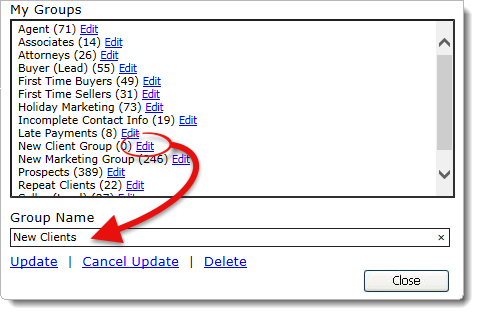
- To change the name of a custom group, click Edit next
to the group, adjust the Group Name as needed using the
field at the bottom, and click Update to save your
changes.

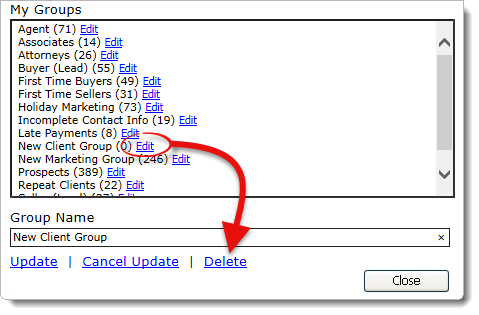
- To remove a group, click Edit next to the group and
click Delete at the bottom.

- When you're finished, click Close on the lower right.


