The contacts in your XSite are designed to help you track Client Data that
has been captured and continue your marketing efforts. All the Client Data
Capture forms in the XSites family of products add contacts into this
system.
There are two kinds of contacts you can add to your database: individual
contacts and company contacts. Of course, any individual can be associated with
a company — eliminating the need to retype information like the office address
and phone number.
In addition, each individual can have other attributes:
- Type of Contact — This designation is critical to
using your contacts to track your business. Marking an individual as a
specific type of contact allows you to focus your marketing efforts and target
specific contact types with your ads.
When an individual is associated with a company, the Type of Contact
(Appraiser, Client, Lender, etc.) applied to that company is automatically
assigned to the individual as well.
- Public or Private Contact — For every company and
individual in your database, you have the option of designating the contact as
Public by selecting the check box at the top of the
Client Details screen. Public contacts can be viewed by
anybody with a User Account
on your site.
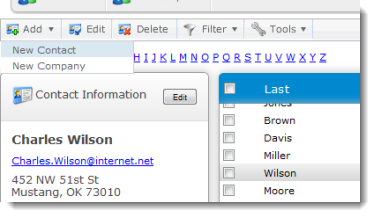
- In the contact manager, click
Add and select New Contact.

- Now go through each tab and complete any necessary details about this
contact.
- The Contact Overview tab is where you enter the basic
information about your contact, such as their name, email address, and phone
number.
- The Groups tab lets you easily put a contact into a
marketing group. If that group is being used by an XSellerate campaign, that
contact is automatically enrolled into the campaign and will begin to
receive your ads.
- The Notes and Add'l Info tab allows you to enter
information such as a birthday or additional notes, and view any licenses or
certifications.
- The Marketing tab enables you to include contacts in
XSellerate campaigns without necessarily even going to the XSellerate
system.
- When you're finished, click Save to apply your changes.
Then, click Exit, or click the X on the
upper right to close the window and return to the Contacts Manager.
From your contact manager, click Add in the Contacts toolbar
and select New Company from the drop‑down menu. In the window
that appears, there are a few options:
- In the Contact Details screen, complete all applicable
fields for this company.
- On the upper right of the window, select the appropriate type of contact
for this company. Note that you can select more than one type.
- Check the Shared option on the upper right to make this
company available to anybody with a User Account on your site.
- On the right side of the window, below the contact Types
is a section showing all of the contacts that are associated with this
company.
If this is a brand new company contact, you must first save the
company's basic information before the Contacts in
Company appear.
- Click the Add link to create a new Individual contact
assigned to this company.
- Select a contact from the list of Contacts in Company
and click Edit to update their contact details.
- Select a contact from the list of Contacts in Company
and click Delete to remove the individual contact from your
contacts database.
- Click Save to save this Company information and then
click Exit to return to your contact manager.
