Upload From Your Vault Account

If you prefer not to use our scheduler or you need to upload a file before the scheduled time, you can upload an individual file directly through your online Vault account.

To upload to Vault:

  1. Log in to your Vault account.
  2. Click Upload.

    Upload Button

  3. In the window that appears, click Select file(s) to browse for the file(s) you want to upload.

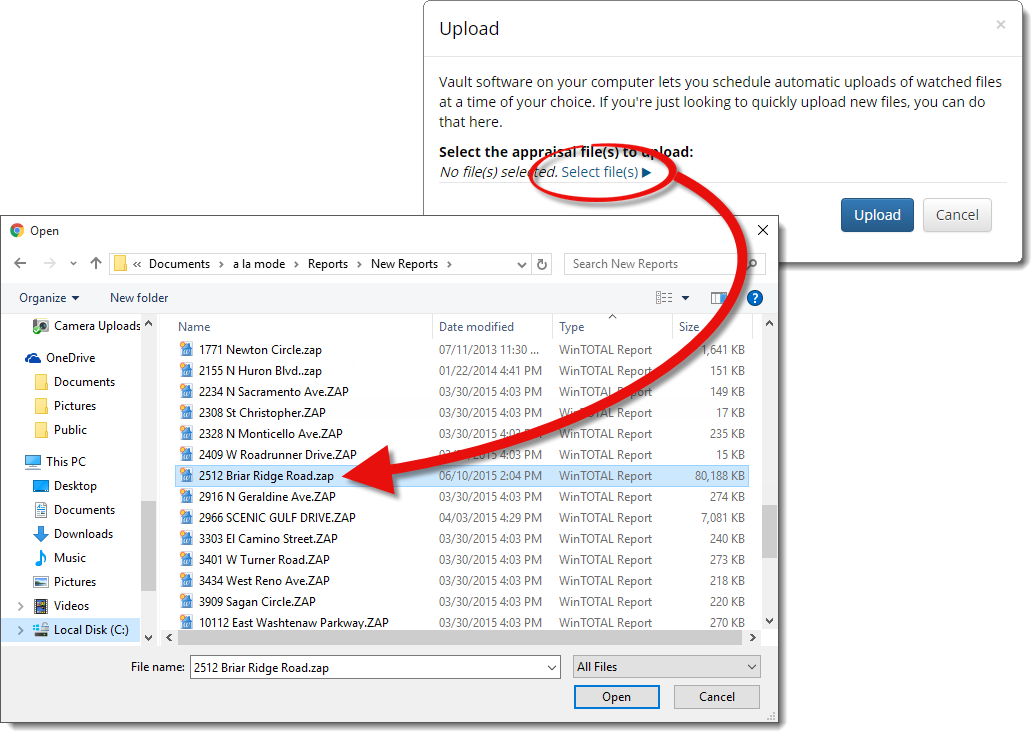
    If you’re using WinTOTAL, your files should be located in the FILES folder inside your WinTOTAL installation. For example, in Aurora, your file should be located within a folder at C:\a la mode\WinTOTAL\FILES. In TOTAL your files might be located in C:\Users\*Your User Name*\Documents\a la mode\Reports or C:\Users\Public\Documents\a la mode\Reports.
  4. When you find the file you want to upload, select it from the list, and click Open. You can choose multiple files to upload by holding down the Ctrl key on your keyboard while selecting files.
  5. Repeat steps 3 and 4 to add any additional files that you'd like to upload to Vault. To remove a file from the list of files to be uploaded, simply click the X beside the file name.

  6. When you're ready, click Upload to upload your file(s) to Vault.

  7. When Vault has finished uploading your files, you'll receive a message indicating that the files were successfully uploaded. Click Close to return to your list of files stored in Vault.