Add Subject Photos |
||
Adding images to your report is as simple as browsing out to them. Of course, since TOTAL for Tablet PC is optimized for mobile PCs like tablet and UMPC devices, it may be easiest for you to add images to your reports by using either a direct connection to your camera (like USB or Bluetooth) or by simply inserting your camera's SD card directly into your mobile PC. Remember, though, that every camera and mobile PC is different so your camera and PC combo may not support some of those connection options.
To add a subject photo to your TOTAL for Tablet PC report:
- With a report open in TOTAL for Tablet PC, click the Comps & Images tab in the top toolbar.
- Select the Property Images tab in the screen that appears.
- Any images that are currently in your report are listed as thumbnails. Click the Add Photo option at the end of the list to insert a new photo.
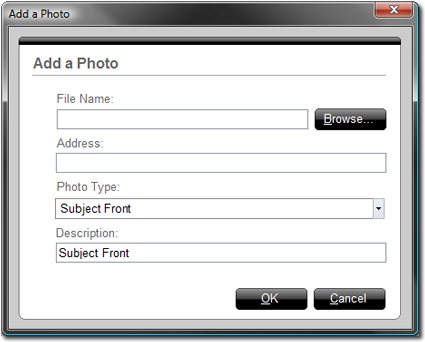
- In the screen that appears, click Browse and navigate out
to the image you want to insert on your computer's hard drive, an SD card, or
directly on your camera through a USB or Bluetooth connection. Once you find
the photo you want to insert, select it and click Open.

Note: SD cards and direct connections to camera devices through Bluetooth and USB are all managed by Windows. No extra configuration is needed in Windows and in most cases, these devices appear as camera or drive icons in Windows Explorer.
- In the fields provided add an Address,
Description, Photo Type, and any
Notes you want to attach to your subject photo.

- When finished, click OK to insert your photo into your report.
As necessary, you can edit the photo's data at any time in the future. To do so:
- From TOTAL for Tablet PC's Comps & Images manager, select the Property Images tab.
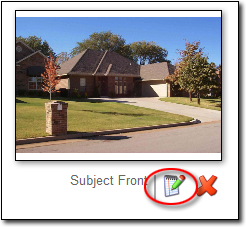
- Find the image you need to edit and click the Edit button
beneath it.

- In the screen that appears, change any information you need or even Browse out to a new photo.
- When finished, click OK to save your changes.

Other brand and product names are trademarks or registered trademarks of their respective owners. © CoreLogic | a la mode technologies, llc | Terms of Use | Privacy Policy |