The Data Preference Settings in QuickSource allows you to sort your preferred
data sources, choose which data source you want to use first, adjust formatting,
and create rules on a field‑by‑field basis. Follow the instructions below to
configure your Data Preference Settings. Or, click
here to jump to the section below for instructions on adjusting the
formatting, and creating or editing rules:
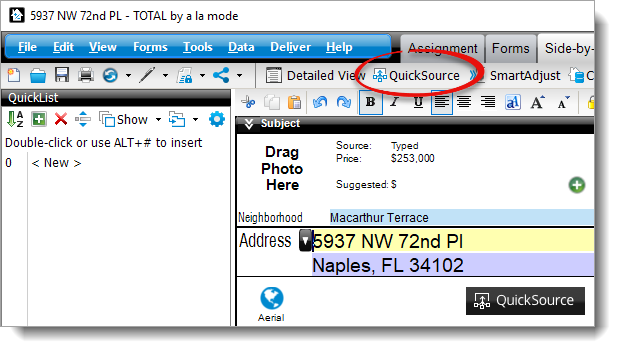
- From the Side‑by‑Side
PowerView, click QuickSource in the toolbar on the
upper left to launch the Data Discrepancy View.
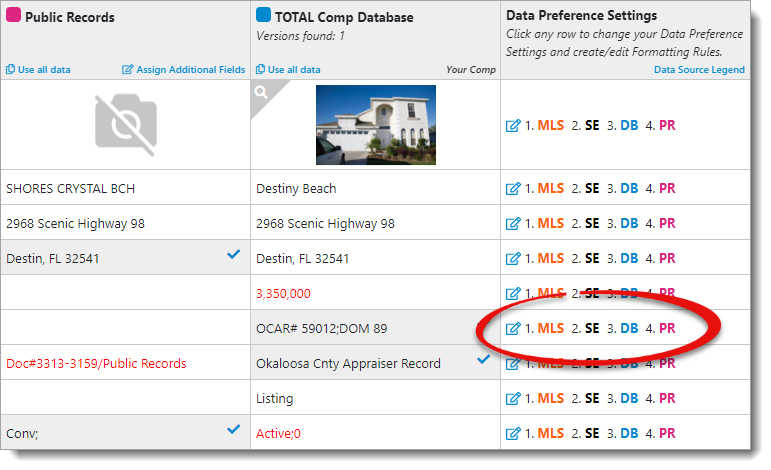
- Click the link in the Data Preference Settings column to
the right of the field you want to configure.
- Configure your data source preferences in the Priorities
tab:
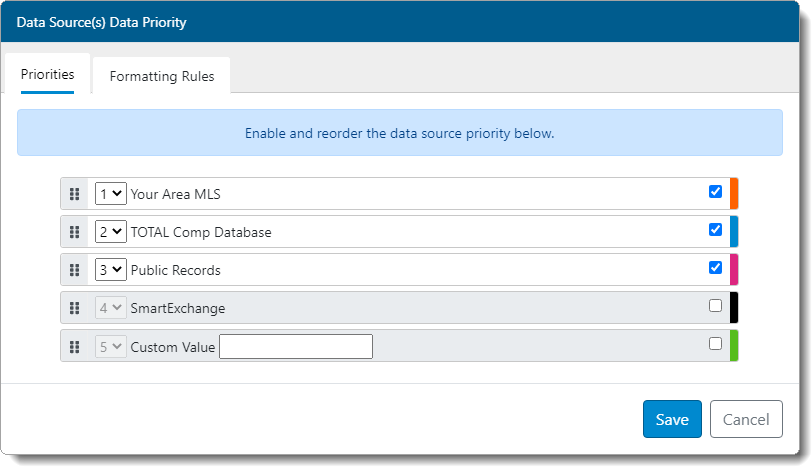
- Click and drag the textured icon ( ) to the left of a data
source to rearrange and prioritize which data source is used first.
- Use the drop‑down menus to assign a specific rank — with number one
being your most preferred data source and number five being your least
preferred.
- Place your cursor in the Custom Value field and enter
custom text you want to transfer to the field each time.
- Check or uncheck the box to the right of a data source to enable or
disable the data source for the current field. Disabled data sources will
not transfer data for the current field.
- When you're finished, click Save to save your changes and
return to the Data Discrepancy View. Or, continue with the section below for
instructions on adjusting the formatting, and creating or editing rules.
Follow the instructions below to choose your preferred case, and create or
adjust rules for a specific field:
- From the Side‑by‑Side
PowerView, click QuickSource in the toolbar on the
upper left to launch the Data Discrepancy View.
- Click the link in the Data Preference Settings column to
the right of the field you want to configure. Then, go to the
Formatting Rules tab.
- Create or adjust your Search and Replace Rules:

- Click Add New Rule to create a new rule
- Use the first drop‑down menu to indicate whether you want to apply the
rule when the field Contains the value anywhere in the
field, or if the field Equals the value and matches it
exactly.
- Enter the value you want to use for the search.
- Use the second drop‑down menu to choose whether you want to replace the
Entire Text, only the Matching Text,
Append at the End, or Prepend the value.
- Enter the value you want to use as the replace value.
- Use the third drop‑down menu to choose whether you want this rule to
apply for All, UAD, or
Non‑UAD form types.
- Once you've created two or more rules, click and drag the textured
icon ( ) to the left of a rule to
rearrange and prioritize the order in which the rules are applied. Rules are
applied top to bottom.
- Click the delete icon ( ) to the right of a rule to
delete and remove it for the current field
- Review the Data Source(s) Result to compare the
original value for the field, and the new value that was created based on
your preferred casing and any custom rules that have been applied.
- Choose your Preferred Case for the current field. Options
include:
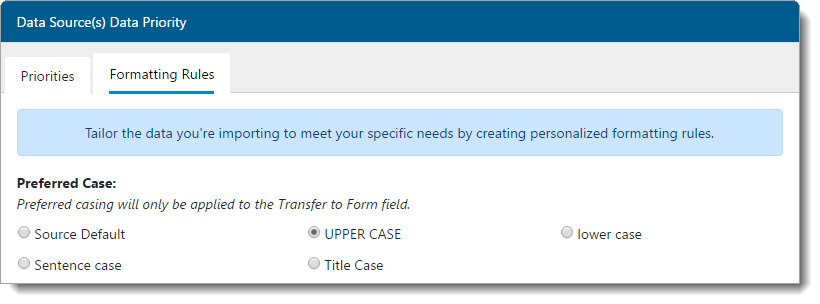
- Source Default
- This option makes no changes to the case of the text and transfers the
data to your report exactly as it was retrieved from the data source.
- lower case
- This changes the case to all lower case letters for each word.
- Title Case
- This option capitalizes the first letter of each individual word.
- UPPER CASE
- This changes the text to use all capital letters for each word.
- Sentence case
- This option capitalizes only the first letter of the first word. All
subsequent words begin with a lower case letter.
- When you're finished, click Save to save your changes and
return to the Data Discrepancy View.
That's it! Your Data Preference Settings, formatting, and rules are now
saved. Once you're returned to the Data Discrepancy View, review the subject and
comparable data returned by QuickSource and click
Save &Close to transfer the data to your report. Or,
simply click Cancel, and then click Yes to
confirm you want to exit QuickSource without transferring data to your
report.
