The Comps Database Grid view presents your comparables in an
organized list with information displayed in customizable columns.
- Quickly sort the comps list by clicking a column header. Click the same
column header again to reverse the order.
- Select a comparable from the list to view all of its available information
in the Comp Details panel on the right. Depending on the
source of the comprabale data, the comp information is displayed as it would
appear on the form, or it is displayed on a generic grid with each available
field listed. The information that appears for the property in the Comps
Details panel can be edited on the fly.
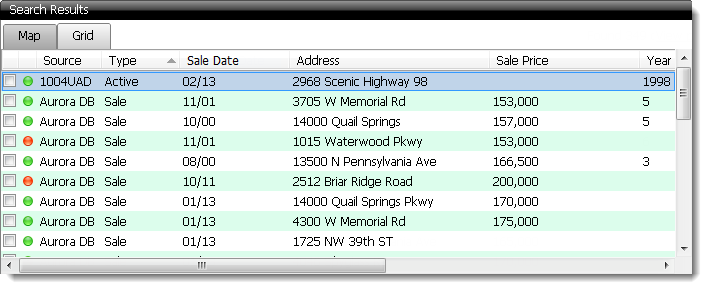
Each comparable in your database is geocoded, and the success of that
geocoding is indicated by a red or green icon beside each comparable. In a
perfect scenario, mapping software places every property exactly where it is
located on a map, but, this isn't always the case. Newer properties don't always
have available information, or sometimes the map image may be outdated for a
particular area.
You can view the current placement of your properties that have a green
indicator beside them in the Comps Database Map view, or
right-click the property from the comps Grid and choose the
option to Show on map to view it in a separate window. If a
property does not have enough information available, or if there was a problem
geocoding the address, it is indicated with a red icon. To Resolve gecodoing or
placement issues:
- Right-click a property with a red icon in your Grid view,
and choose the option to Place on map.
- In the window that appears, verify that the address information is entered
correctly. Sometimes digits in the ZIP code can be accidentally transposed, or
a simple typo can cause a geocoding issue. Once you have verified that the
address is correct, click Geocode Again. If this corrects the
placement, or geocodes the property correctly, click OK to
save the information and return to the comps Grid. If the placement or
geocoding is not corrected, proceed to the next step.

- Sometimes, mapping information for a property just isn't available. In
this case you must manually place it on the map:
- Click the magnifying glass icons to zoom in and out on the map, and
click and drag the map image to find the correct location for the property.
- Click Place.
- Click the location on the map where the property is located. If you make
a mistake, click Remove, then click Place,
and click the map image again to indicate the placement.
- When the property placement is correct, click OK to save
the information and return to the comps Grid.
To select which columns are displayed by default:
- Right-click anywhere in the Grid view and
select Edit Column Layout.
- From the list of Available Fields on the left,
double‑click the ones you want to include, or select it and click the right
arrow in the center. Similarly, double‑click any item in the Displayed
Fields column on the right to remove it from your list of columns, or
select it and click the left arrow in the center.
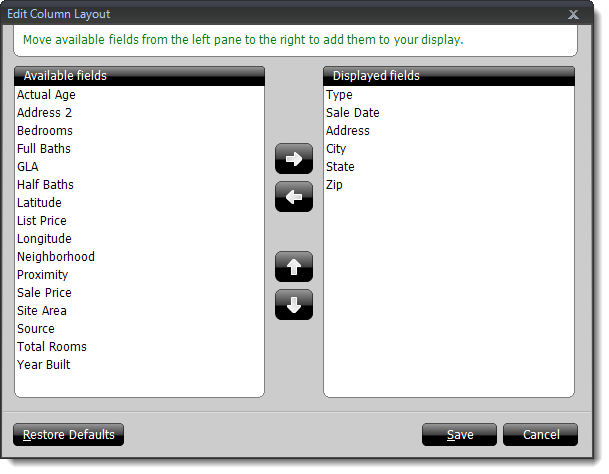
- Select an item from the list of Displayed Fields on the
right and use the Up and Down arrow buttons to prioritize
and adjust the order in which they appear in the Grid view.
- Click Save to save your changes and return to
the Grid view.
Check the box beside each property you want to place in you report. As you
select comps, a Comps Marked button appears. Click
Comps Marked to open a separate window and view the comps
currently selected to be placed in your report. Uncheck a box in the comps grid,
or from the Marked Comps window to remove them from the list of comps to be
placed. Click Place in the Marked Comps window, or from the
Comps Database toolbar to place them in your report
After placing the comps in your report, the comps database window remains
open, and the Marked comps button that was present previously changes so that it
now displays View placed comps in Side‑by‑Side. Click
View placed comps in Side‑by‑Side to jump to them in the Side-by-Side
PowerView.