Photo Settings

TOTAL's photo settings affect how TOTAL automatically optimizes and formats your images.

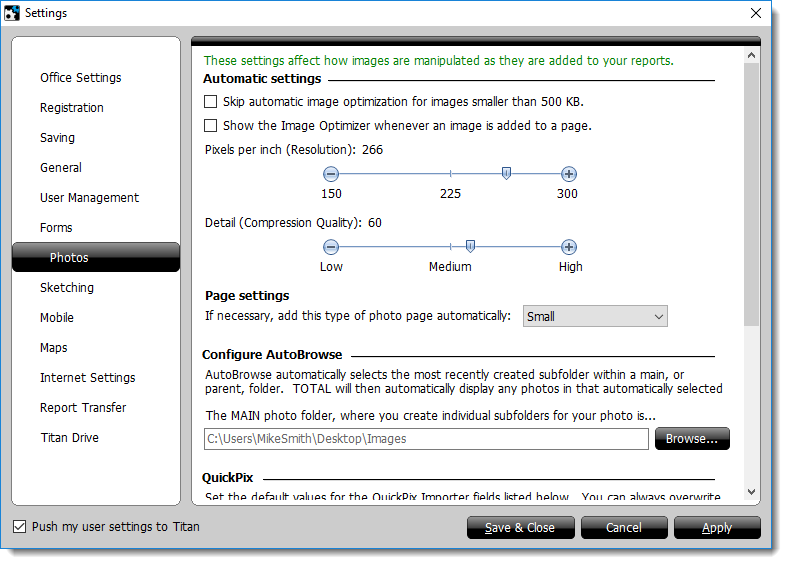
TOTAL's image optimization settings are preset to those which have been tested to return the best results overall. However, it's possible that you can adjust these settings to achieve better quality for your own images. To change TOTAL's photo settings:

  1. In TOTAL, click Tools, Configure Settings.
  2. Click the Photos tab on the left.

  3. These settings help you set several options that determine how TOTAL will optimize your images. The default settings have been shown to work across a broad cross-section of images. However there are settings you can change if you'd like a different result:
  4. Occasionally, TOTAL will need to add a new photo page to accommodate an image you have inserted. You can choose what type of photo page to add in the Page Settings dropdown.
  5. Click Apply or Save & Close to save your changes.

AutoBrowse

To configure AutoBrowse:

  1. From the Tools Menu, click Configure Settings.
  2. When the window opens, click Photos on the left.
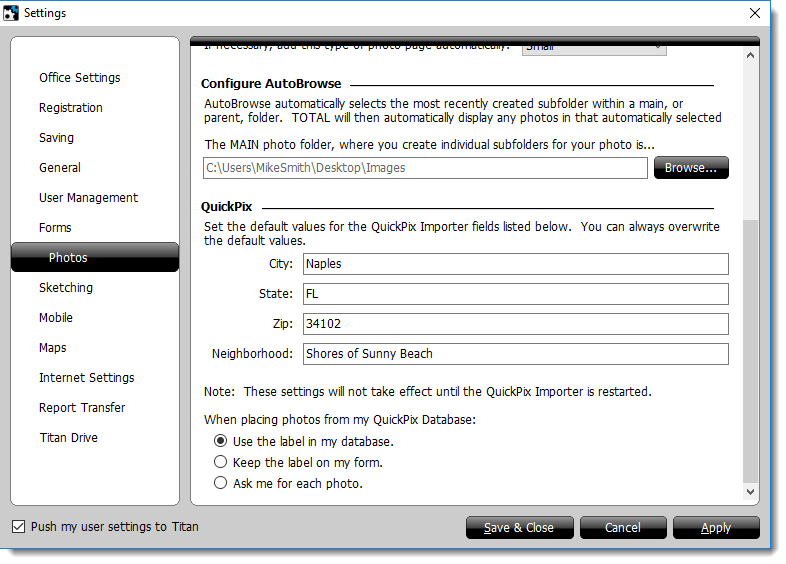
  3. In the Configure AutoBrowse section, click Browse to set your parent folder.
  4. Click OK, then click Apply or Save & Close to save your changes.

QuickPix

  1. In TOTAL, click Tools, select Configure Settings and click Photos on the left. Or, simply click the Settings button in the QuickPix Importer.

  2. In the QuickPix section, you can customize your QuickPix Importer and Database:
  3. When you're finished, click Save & Close on the lower right.

Titan Photos

  1. With a report open in TOTAL click Tools, and select Configure Settings from the drop‑down menu.
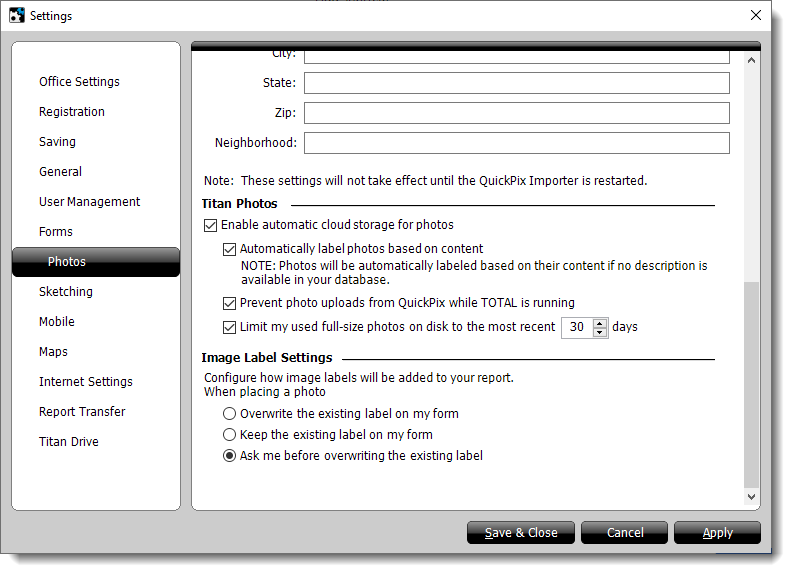
  2. Select Photos on the left, and then scroll to the Titan Photos section to adjust your options on the right:

    Enable automatic cloud storage for photos
    Check or uncheck the box next to this option to enable or disable automatic upload of images when placing an image in a report. Keep in mind that unchecking the box to disable this feature disables all other image analytics features and disables all other settings.
    Automatically label photos based on content
    Our built‑in image analytics are used to automate the labeling of photos placed in your report. Check the box next to this option to enable it, or uncheck the box to disable it. When enabled, the following features happen automatically in Titan Reports:
    • When present, address information and a photo description are included when you upload an image
    • Caption placement
    • Photo description for the image is updated
    • The address for the photo is updated.
    Allow image uploads from QuickPix while TOTAL is running
    Enable this option to allow QuickPix to continue uploading images while TOTAL is running.
    Limit my used full‑sized photos on disk to the most recent XX days
    When you add images to a report or import them into your QuickPix database, the full‑size versions are stored both locally and in the cloud. Over time, the accumulated images can consume a significant amount of your computer's hard drive space.
    Enable this option to limit how long photos are stored locally. You're still able to view and search photos locally through your QuickPix database using image thumbnails, but the full‑size images are removed from your local hard drive and available on the cloud via Titan Photos.
    If you need access to the full‑size image, TOTAL downloads it from Titan Photos automatically when you place the image in a report. If you're not online, you're prompted to use the local thumbnail or go online to retrieve the full‑size image.
  3. When you're finished, click Apply to apply your changes and continue adjusting settings, or click Save & Close to save your changes and return to your report.

Image Label Settings

  1. With a report open in TOTAL click Tools, and select Configure Settings from the drop‑down menu.
  2. Select Photos on the left, and then scroll to the Image Label Settings section to adjust your options on the right.
  3. Choose whether you want to Overwrite the existing label on my form automatically, or Keep the existing label on the form when placing a photo and a label is already present.
  4. When you're finished, click Apply to apply your changes and continue adjusting settings, or click Save & Close to save your changes and return to your report.