Import Aurora Images

To import images from Aurora's Photos Database:

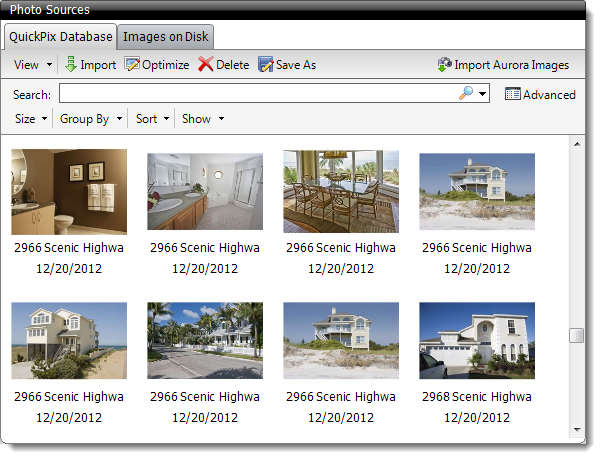
  1. From the Photos PowerView, click Import Aurora Images on the upper right of the Photo Sources pane.

    Import Aurora Images button

    This option only appears when TOTAL detects an Aurora installation on your computer. If Aurora is not installed, or if you transferred your files and settings from another computer, you must use the Aurora Transition Assistant to import your photos from Aurora. Click here for instructions.
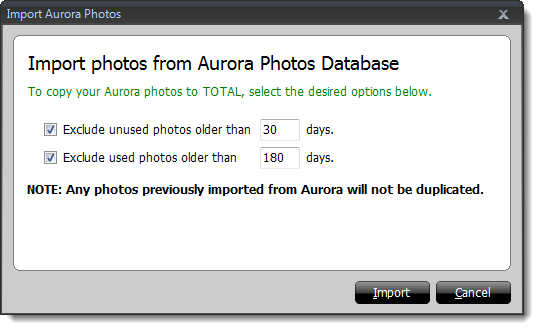
  2. In the window that appears, check the boxes to exclude unused photos or used photos that are older than a specified number of days, and/or click Import to begin the import process.

    Exclude Unused and Used Photos

  3. Next, TOTAL detects the number of photos available for import and calculates the amount of space required to import them to your TOTAL Photos Database. You must have enough disk space available before proceeding. Click Continue to import the photos. If you do not have enough space available, click OK to return to the previous screen, clear some additional space on your hard drive, then try the import process again.

    Photos detected and required disk space

    Depending on the number of photos being imported, this may take anywhere from a few seconds, to a few minutes.
  4. When TOTAL finishes importing your photos, you're returned to the previous screen, and the number of photos successfully imported is displayed. Click OK to exit and return to the Photos PowerView.