To optimize or enhance an image in your report:
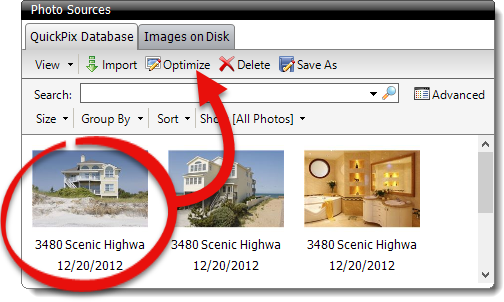
- From the Photos Powerview, double‑click an image, or
select a photo and click Optimize in the Photo
Sources pane.

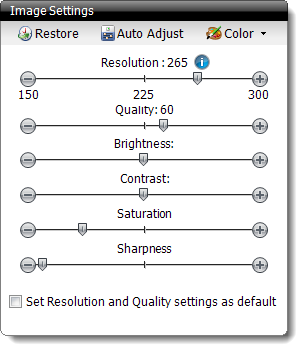
- Now, the Image Optimizer appears. There are several tools available for
you to optimize the appearance of the image while minimizing the file size of
the image in your report:

- Use the Resolution slider to determine what resolution
you'd like the image to display. As you lower the resolution, the detail of
the image will decrease, as will the image's file size.
- Use the Quality slider to determine the quality of the
compression to be used on the image. Again, a lower number will result in a
poorer quality image with a lower file size.
- Slide the Brightness slider to adjust the virtual
"exposure" of the image.
- Slide the Contrast slider to darken or lighten the
image.
- Slide the Saturation slider to make the image colors
more dull or vivid.
- Slide the Sharpness slider to blur or "sharpen" the
image quality.
- Click Restore in the toolbar at any time to revert any
changes, and display the original image.
- Click Auto Adjust to have TOTAL automatically adjust
the image settings for you
- Use the Color dropdown to decide whether the image
should converted to Color, Grayscale,
Black & White, or Retain Current
color.
- Click Apply to apply the changes to the current image.
- Select another photo from the All Report Images panel at
the bottom to optimize additional images, or Click Save
Images to save your changes and close the image optimizer.

