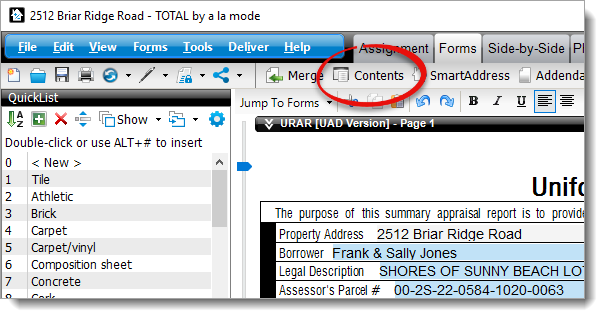
The Contents window in TOTAL is where you find the forms library. To access
the Contents window, simply click Contents in the top
toolbar.

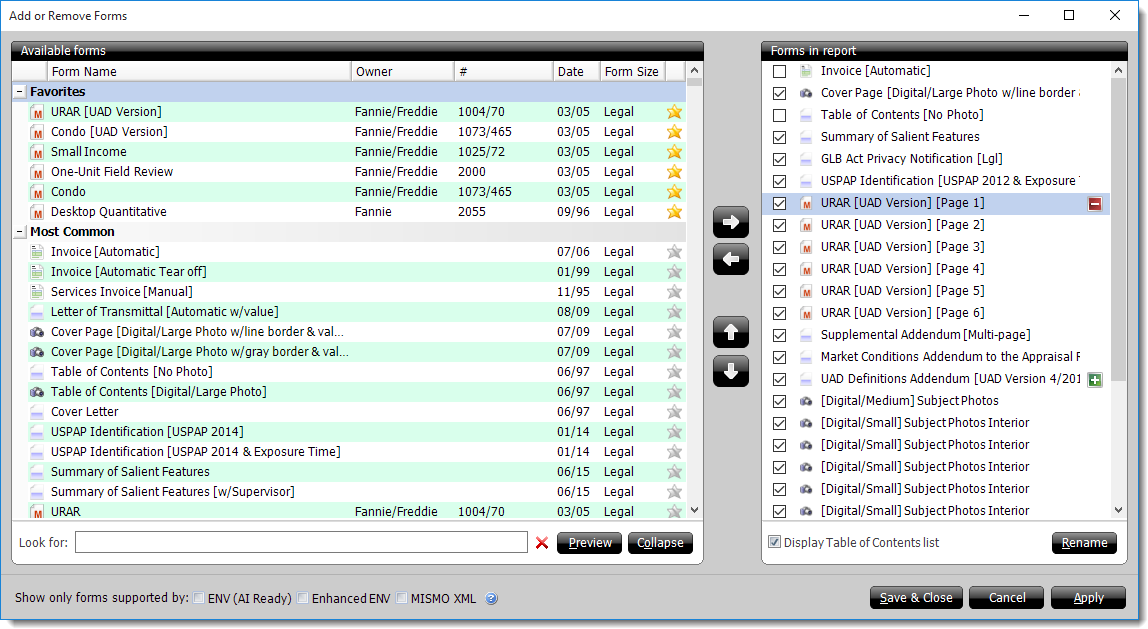
The forms and pages in your report are displayed on the right. The forms
library is displayed on the left. Here you can add, remove, and rearrange the
forms in your report.
Click here to view a list of
hotkeys for the Contents Window

- There are 6 types of forms available in Contents. The form type for each
form is indicated by the icon that appears to the left:
 — Major form
- A form icon with a red letter M indicates a major form. This includes
forms such as the 1004 (URAR), 2055, and 1073 forms.
 — Sketch Form
- When you start a new sketch from within a report, the sketch form is
automatically added to your report, so there is no need to add the form from
here. These forms are available if you're manually adding a sketch to your
report from somewhere outside of TOTAL (such as a scanner, camera, or
website.)
 — Map Form
- Just like the sketch forms, maps are automatically inserted into the
report when you retrieve one using the map wizard, so there is no need to
add the form from here. These forms are typically used when manually adding
a map such as a plat map from your county assessor's website or adding a
zoning map.
 — Photo Form
- Indicates a photo form such as a subject photo page, comparable photos
page, or photograph addendum.
 — Invoice Form
- This indicates any kind of invoice form such as an automatic invoice,
manual invoice, or services invoice.
 — Minor Form
- This includes any type of form not described above — such as a
supplemental addendum, a cover letter, or an additional comparables form.
- To add a form to your report, select the page and click the right
arrow (
 ), or double-click the form
on the left to add it to the list of Forms in report on the
right. Double-click a form from the list of Forms in report
on the right to close the Contents and jump to that form in your report.
- To remove a form from your report, select it from the list on the right
and click the left arrow (
 ), or press the Delete
key on your keyboard.
- To move a form in your report, simply select it from the list on the right
and drag it to the position you want. You can also use the up and down
arrows (
 ) to rearrange forms.
- To view the individual pages of a multi‑page form, click the green plus
sign (
 ) to the right of the form.
This also allows you to split a form. Now, you can move other pages or forms
into the multi‑page form — such as an Additional Comparables page, after
page 2 of the URAR.
- To unsplit the major form, click the red minus (
 ) sign to the right of page 1
of the multi‑page form. Any additional pages that were moved into the
multi-page form are taken out and placed immediately after the last page of
the multi‑page form.
- To search for a specific form click into the Look for:
box, type in your search criteria, and press Enter. Or, click
the green up and down arrows to cycle through each form that matches your
search criteria.
- You can also designate forms that you use the most as favorites. Just
click the grey star (
 ) next to the form
and when it changes to gold (
  ), it has been added to
your Favorite Forms.
- Click Preview to examine the form before you add it
to your report.
- To collapse a form category, click the minus sign (
 ) beside that category.
- To expand a form category, click the plus sign (
 ) beside that category.
- To collapse all of the form categories at once click
Collapse on the lower right of the list of Available
forms on the left.
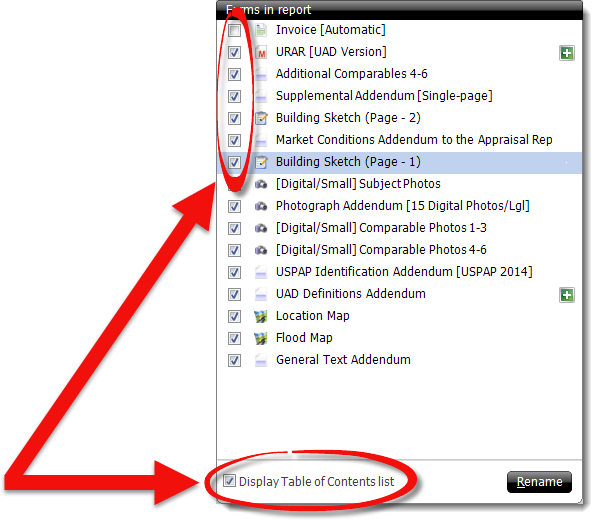
- To enable the Table of Contents column, click Display Table of
Contents list. Check the checkbox next to the form in your report to
include it in the Table of Contents. Or, uncheck the checkbox to keep the from
appearing in the Table of Contents.


 ), or double-click the form
on the left to add it to the list of Forms in report on the
right. Double-click a form from the list of Forms in report
on the right to close the Contents and jump to that form in your report.
 ), or press the Delete
key on your keyboard.
 ) to rearrange forms.
 ) to the right of the form.
This also allows you to split a form. Now, you can move other pages or forms
into the multi‑page form — such as an Additional Comparables page, after
page 2 of the URAR.
 ) sign to the right of page 1
of the multi‑page form. Any additional pages that were moved into the
multi-page form are taken out and placed immediately after the last page of
the multi‑page form.
 ) next to the form
and when it changes to gold (
  ), it has been added to
your Favorite Forms.
 ) beside that category.
 ) beside that category.
