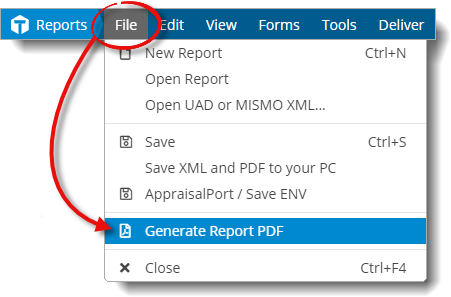
To print your report to PDF:
- In an open report in Titan Reports, click File on
the upper left, and select Generate Report PDF from the
drop‑down menu.

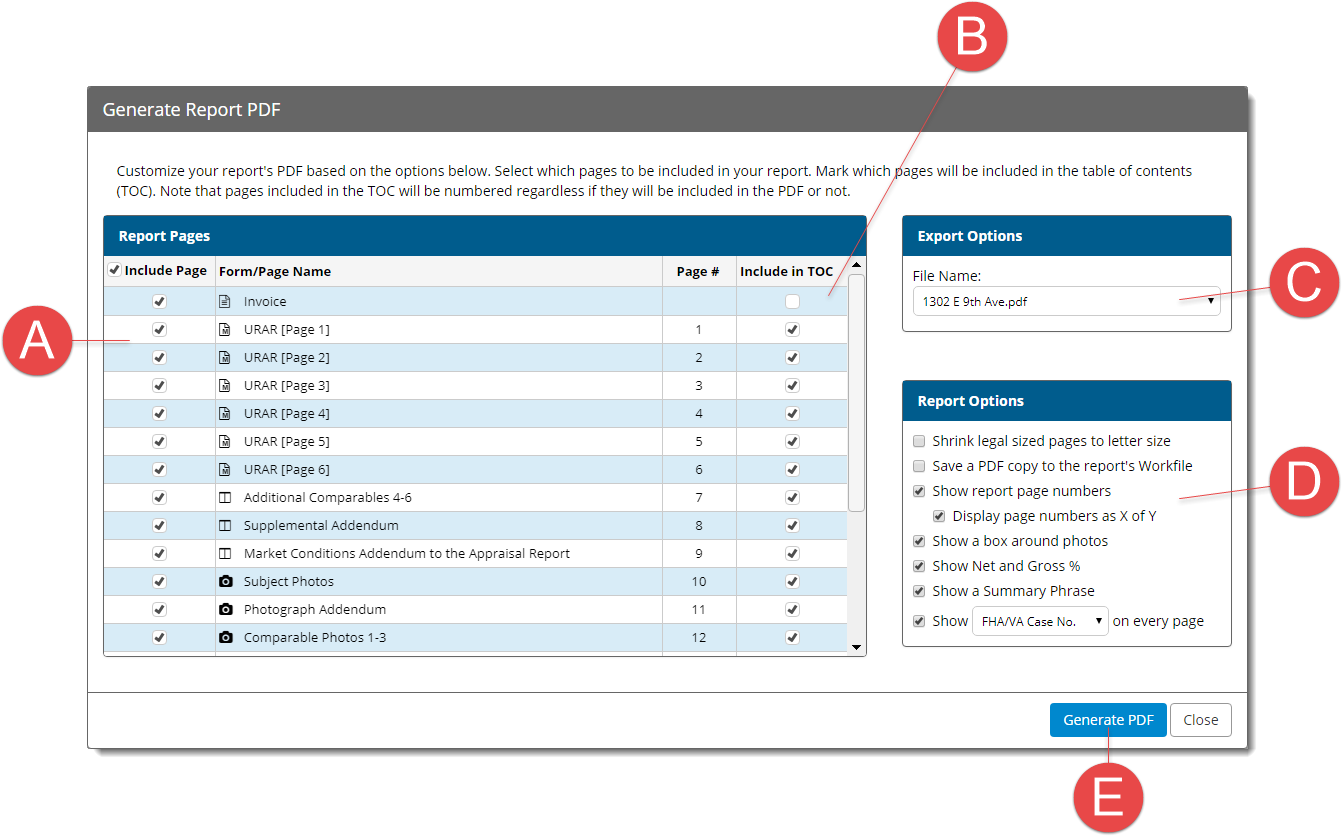
- In the screen that appears, adjust your PDF options:

- Check the box beside each page you want to print. To select all pages,
click the Include Page checkbox. To deselect all pages,
uncheck the Include Page checkbox.
- In the Include in TOC column, check only the pages you
want to show in the Table of Contents and display a page number.
- Choose how you want to name the file from the drop‑down menu in the
Export Options.
- Adjust your Report Options:
- Shrink legal sized pages to letter size
- When enabled, this option shrinks any legal sized forms in your report
to fit on a letter sized (8½×11) page.
- Save a PDF copy to the report's Workfile
- Copies an original version of your report PDF into your Workfile so
that you have a time-stamped copy of your original PDF in case you
need it.
- Show report page numbers
- Displays a page number in the top corner of every page of your report.
- Display page numbers as X of Y
- Displays page numbering as one of a series of pages (5 of 32, for
example) instead of a single page number for each page of your report.
- Show a box around photos
- Draws an outline around each photo in your report.
- Show Net and Gross %
- Displays the net and gross percentages on any form where they are not
already a part of the copyrighted form.
- Show a Summary Phrase
- Includes a brief summary phrase at the top left of your report.
- Show <choice of file number> on every page
- Enable this option to choose one of the following file number options
to display on each form in your report:
- Main File No.
- Other File No.
- Internal Order No.
- Lender Order No.
- Client File No.
- FHA/VA Case No.
- Generates a PDF copy of the report.
- When you're finished, click Generate PDF (E) to create
the PDF file.

